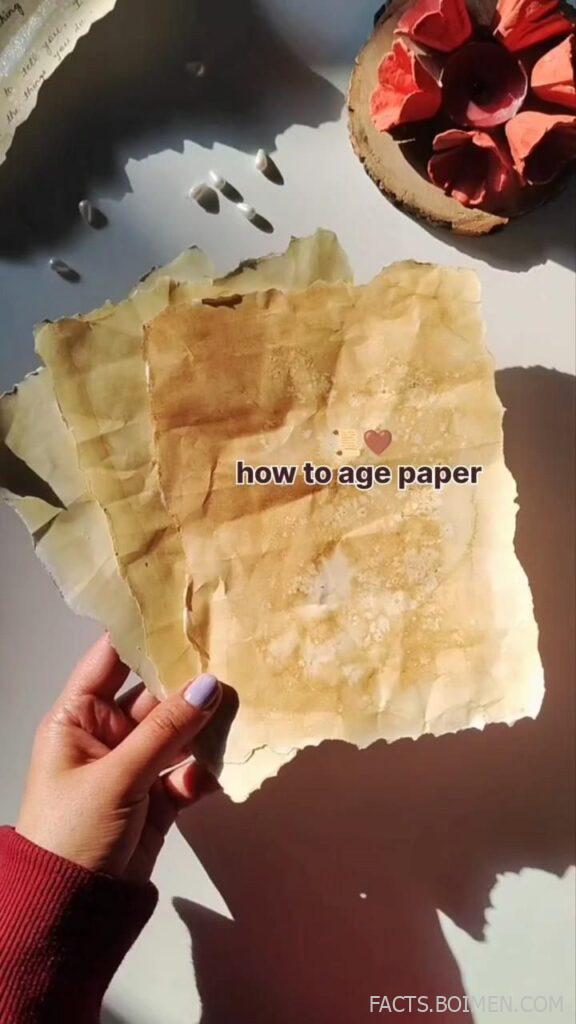
Aging paper is one of those quiet crafts that instantly makes everything look like it has a story. A plain sheet becomes a treasure map, a love letter from 1890, a page torn from a forgotten diary. The good news: you do not need special skills, a studio, or expensive supplies. Most of the best techniques use things already sitting in your kitchen.
Below are 17 methods and tools for giving paper that warm, weathered, vintage look — from five-minute coffee stains to proper aging inks and deckled edges. Whether you are making aesthetic stationery, journaling ephemera, or props for a cosplay, there is a technique here for you.
Table of Contents(Click to Toggle)
- Why Aged Paper Makes Everything Look Better
- 17 Ways to Age Paper
- 1. Coffee and Tea Staining
- 2. Walnut Ink
- 3. Distress Ink Pads
- 4. Tim Holtz Distress Oxide Sprays
- 5. Oven Baking Method
- 6. Sun Tea Aging
- 7. Acrylic Wash and Brayer
- 8. Rubbing with Dirt or Chalk Pastels
- 9. Deckle Edge with a Ruler
- 10. Candle Singeing for Burnt Edges
- 11. Salt and Watercolor Bloom
- 12. Lemon Juice and Heat
- 13. Soy Sauce Wash
- 14. Ink Pad Direct-to-Paper
- 15. Beeswax and Iron
- 16. Digital Aging with Photoshop
- 17. Aging with a Heat Gun
- Bonus Mentions
- The Best-Kept Paper Aging Secrets
Why Aged Paper Makes Everything Look Better
There is a reason vintage paper shows up everywhere from bullet journals to wedding invitations to D&D props. Aged paper signals history. It tells the viewer that something has been handled, saved, and cared about. That emotional pull is hard to fake with a clean sheet fresh from the printer.
And here is the practical part: aging paper is genuinely easy. Most methods take under ten minutes, use pantry ingredients, and cost almost nothing. You can age a single page for a journal entry or a whole stack for a party invitation suite. The techniques below range from the classic coffee soak to digital filters, so you can pick based on how much mess you want to make and how permanent the result needs to be.
One tip before you start: always test on a scrap of the same paper first. Different papers absorb differently, and a technique that looks perfect on thick cardstock can turn to mush on thin printer paper.
17 Ways to Age Paper
1. Coffee and Tea Staining : The Classic Pantry Method
What it is: Brewing strong coffee or black tea, then brushing or soaking it onto paper to create a warm, uneven tan.
Category: Wet staining
Why it stands out:
- Uses ingredients you already own, no shopping required
- Layers beautifully — each coat deepens the color
- Works on almost any porous paper, from copy paper to watercolor stock
Best for: Beginners making journal pages, letters, and quick props. Let the paper dry flat on a baking rack so the edges curl naturally.
2. Walnut Ink : Rich, Permanent, Museum-Quality Tone
What it is: A traditional ink made from walnut hulls that produces a deep sepia-brown stain.
Category: Natural pigment
Why it stands out:
- Gives a genuine antique tone that coffee cannot quite match
- Lightfast and stable once dry, unlike some food-based stains
- A little goes a long way — a small bottle lasts years
Best for: Artists and calligraphers who want a serious, archival-looking finish. Dilute with water for a lighter wash.
3. Distress Ink Pads : Controlled, Blendable Aging
What it is: Water-based dye ink pads designed for paper crafting, sold in colors like Vintage Photo and Antique Linen.
Category: Craft ink
Why it stands out:
- Blends smoothly with a foam applicator for seamless gradients
- Available in dozens of vintage shades so you can match any era
- Dries quickly and does not warp the paper the way soaking does
Best for: Card makers and scrapbookers who need precision around stamped images or photos.
4. Tim Holtz Distress Oxide Sprays : Speckled, Watercolor-Like Texture
What it is: Pigment-and-dye hybrid sprays that react with water to create mottled, oxidized patterns.
Category: Spray medium
Why it stands out:
- Creates realistic age spots and water rings in seconds
- Can be layered with stencils for maps and documents
- The chalky finish looks like sun-faded old paper
Best for: Mixed-media artists building layered, textured backgrounds. Spray outdoors or over a box to contain the mist.
5. Oven Baking Method : Fast, Even Toasting
What it is: Placing paper on a baking sheet in a low oven to gently toast it to a golden hue.
Category: Heat aging
Why it stands out:
- Takes only a few minutes at around 200°F
- Produces an even, all-over tone rather than blotches
- Edges brown first, which mimics natural aging
Best for: Speeding up a batch of invitations. Watch it constantly — paper can scorch in under a minute.
6. Sun Tea Aging : Slow, Sun-Baked Fade
What it is: Leaving tea-stained paper in direct sunlight to dry, letting UV light fade and yellow it further.
Category: Sun and stain
Why it stands out:
- Creates the uneven, patchy fading of genuinely old documents
- Free and completely passive — set it and forget it
- Works best on already-stained paper for a double-aged look
Best for: Summer craft sessions and anyone patient enough to let nature do the work. Bring it in before evening dew.
7. Acrylic Wash and Brayer : Painterly, Streaky Grain
What it is: Thinned acrylic paint rolled or brushed over paper to leave a translucent, streaky film.
Category: Paint
Why it stands out:
- Brayer strokes mimic the grain of handmade rag paper
- Acrylic is permanent, so the result will not rub off
- You control opacity completely by adding water
Best for: Artists who want bold, visible texture. Use a soft rubber brayer and wipe the edges for a worn look.
8. Rubbing with Dirt or Chalk Pastels : Smudged, Handled Edges
What it is: Gently rubbing dry pigment or clean garden soil along the edges and folds of the paper.
Category: Dry pigment
Why it stands out:
- Instantly adds the grime that real old paper collects
- No drying time at all
- Perfect for maps, wanted posters, and treasure documents
Best for: Prop makers and journalers who want a quick, tactile finish. Seal with a light fixative so it does not smudge further.
9. Deckle Edge with a Ruler : Torn, Handmade Edges
What it is: Using a metal ruler to tear the paper edge instead of cutting it, creating a soft, fibrous deckle.
Category: Edge treatment
Why it stands out:
- Instantly reads as handmade or antique
- Requires no chemicals or drying
- Can be combined with any staining method
Best for: Stationery and journal spreads. Tear toward yourself along the ruler for the most natural edge.
10. Candle Singeing for Burnt Edges : Dramatic, Charred Borders
What it is: Carefully passing the paper edge over a candle flame to scorch and curl it.
Category: Fire aging
Why it stands out:
- Creates an unmistakable old-scroll look
- Works fast — seconds per edge
- Can be layered over coffee stains for depth
Best for: Fantasy props and Halloween decor. Always work over a sink or fireproof surface and keep water nearby.
11. Salt and Watercolor Bloom : Crystal Speckles and Texture
What it is: Sprinkling salt onto wet watercolor or tea wash so it pulls pigment into star-like blooms.
Category: Watercolor technique
Why it stands out:
- Creates organic age spots that look completely natural
- Different salt grain sizes give different textures
- An old watercolor trick that transfers perfectly to paper aging
Best for: Artists making maps and nautical charts. Brush off the salt once the paper is bone dry.
12. Lemon Juice and Heat : Invisible Ink That Browns
What it is: Painting with lemon juice, then heating it to develop a brown, oxidized color.
Category: Chemical aging
Why it stands out:
- Dual purpose — you can write secret messages that appear when heated
- The browning is subtle and controllable
- Cheap and safe for supervised craft sessions
Best for: Interactive cards and escape-room style puzzles. Use an iron or oven on low to develop the color.
13. Soy Sauce Wash : Deep Amber in One Pass
What it is: Diluting soy sauce with water and brushing it on for a fast, dark amber tone.
Category: Kitchen staining
Why it stands out:
- One coat gives the depth that coffee needs three coats for
- Available in every kitchen
- Great for dark, dramatic antique looks
Best for: Quick props and dark aesthetic journal pages. Dilute well — straight soy sauce is too dark and salty.
14. Ink Pad Direct-to-Paper : Full-Coverage Vintage Tone
What it is: Dragging an ink pad directly across the paper surface for a solid, even layer of color.
Category: Craft ink
Why it stands out:
- Fastest way to color a whole sheet evenly
- No water, so no warping or waiting
- Blends easily with a sponge for soft edges
Best for: Card bases and tags. Use a light hand and build up — you can always add more.
15. Beeswax and Iron : Translucent, Aged Parchment
What it is: Rubbing a thin layer of beeswax onto paper and melting it with a warm iron.
Category: Wax treatment
Why it stands out:
- Gives a translucent, vellum-like quality
- Makes the paper water-resistant and slightly stiff
- Ages beautifully with a soft, warm glow
Best for: Bookmark and journal cover projects. Place the paper between two sheets of parchment before ironing.
16. Digital Aging with Photoshop : Zero-Mess Vintage Filters
What it is: Using texture overlays, curves adjustments, and noise filters to age a scanned or digital page.
Category: Digital
Why it stands out:
- Perfectly repeatable — apply the same look to a hundred pages
- No supplies, no drying, no cleanup
- Great for print-on-demand and digital planners
Best for: Designers and digital journal makers. Overlay a free paper texture and set it to Multiply for instant age.
17. Aging with a Heat Gun : Sculpted Curls and Toasted Edges
What it is: Using a craft heat gun to warm, curl, and lightly toast paper edges in real time.
Category: Heat tool
Why it stands out:
- Total control — you watch the color develop and stop when it is right
- Curls the edges for a three-dimensional old-scroll effect
- Works on already-stained paper for a layered look
Best for: Crafters who want sculptural, curled pages. Hold the gun moving at all times to avoid scorching.
Bonus Mentions
Michaels : One-Stop Vintage Craft Supplies
What it is: A craft retail chain stocking inks, sprays, papers, and aging tools.
Category: Retail
Why it stands out:
- Carries the Distress and Oxide lines in person
- Frequent coupons make experimenting affordable
Best for: Beginners who want to see products before buying.
JOANN : Fabric, Paper, and Mixed Media
What it is: A craft and fabric store with a deep paper crafting aisle.
Category: Retail
Why it stands out:
- Great selection of specialty and handmade papers
- Regular sales on ink and mixed-media supplies
Best for: Journalers stocking up on textured paper.
Blick Art Materials : Artist-Grade Aging Supplies
What it is: A major art supply retailer with professional-grade pigments and papers.
Category: Retail
Why it stands out:
- Carries walnut ink and professional watercolors
- Bulk paper options for large projects
Best for: Artists who need archival-quality materials.
Pinterest : Endless Visual Inspiration
What it is: A visual discovery platform packed with paper aging tutorials and aesthetic references.
Category: Inspiration
Why it stands out:
- Thousands of step-by-step photo tutorials
- Boards organized by era and style
Best for: Planning a project before you start.
YouTube : Watch Every Technique in Action
What it is: Video tutorials showing real-time aging results.
Category: Learning
Why it stands out:
- See how each method actually behaves before trying it
- Real-time color development with heat tools
Best for: Visual learners and anyone nervous about scorching paper.
The Best-Kept Paper Aging Secrets
The magic of aged paper is that it turns ordinary materials into something that feels personal and permanent. A five-minute coffee wash can transform a plain sheet into a keepsake. A torn deckle edge and a light dusting of pastel can make a letter look like it survived a century in an attic.
Start with the pantry methods — coffee, tea, and lemon juice — because they cost nothing and teach you how paper responds. Once you understand how absorption and drying work, move on to inks, sprays, and heat tools for finer control. And if you want zero mess, digital aging gives you the same look with none of the cleanup.
Whichever route you choose, test on scraps, work in thin layers, and remember that imperfection is the whole point. The uneven edges and blotchy spots are what make it look real.
Which technique are you trying first — or do you have a paper aging trick we missed? Share your favorite in the comments.