Every week, the average household mailbox collects a small mountain of catalogs, credit card offers, and grocery flyers. Most of it goes straight to the recycling bin. But that same stack of glossy junk mail is one of the cheapest, most forgiving raw materials for making your own paper at home. With a blender, a screen, and a little patience, you can turn unwanted envelopes into textured sheets for cards, journals, gift wrap, and even lampshades.
Below are 20 resources, techniques, and project ideas for recycling junk mail into handmade paper — starting with the best free beginner guide, then branching into tools, techniques, and creative uses that keep the whole process fun and low-waste.
Table of Contents(Click to Toggle)
- Why Junk Mail Is the Perfect Starter Material for Handmade Paper
- 20 Homemade Paper Projects and Resources
- 1. Instructables Paper Making Guide
- 2. Arnold Grummer’s Papermill Kit
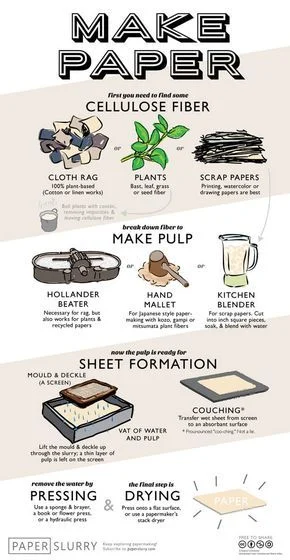
- 3. Blender Pulping Method
- 4. Mould and Deckle Frames
- 5. Seed Paper Cards
- 6. Pressed Flower Embedded Sheets
- 7. Kitchen Blender Paper Pulp
- 8. DIY Paper Ornaments
- 9. Handmade Paper Journals
- 10. Papermaking with a Food Processor
- 11. Newspaper-to-Notecard Method
- 12. Pulp Painting Technique
- 13. Couching and Pressing Basics
- 14. Sizing for Writing-Friendly Paper
- 15. Confetti and Petal Paper
- 16. Paper Bead Jewelry
- 17. Handmade Paper Gift Wrap
- 18. Paper Bowl and Vessel Molds
- 19. Natural Dye Tinting for Pulp
- 20. Papermaking with Kids
- Bonus: Paper Slurry Storage Tips
- Bonus: Drying Rack Alternatives
- Bonus: Scrap Paper Swap Communities
- The Best-Kept Secret in Home Crafting
Why Junk Mail Is the Perfect Starter Material for Handmade Paper
Junk mail arrives with two qualities that make it ideal for papermaking: it is already broken down into small, flat sheets, and it comes in a wide range of colors and paper weights. Glossy catalogs give you bright, saturated pulp. Plain envelopes give you soft, pale pulp. Bills and statements often use sturdier stock that holds up well when blended.
Because you are shredding and re-pulping the paper anyway, ink smudges and printed images mostly disappear into the slurry. The result is a rustic, speckled sheet that feels personal and handmade. It is a low-cost way to try a craft that otherwise requires buying cotton linters or specialty pulp. And the environmental angle is real: instead of sending another stack of paper to recycling, you are giving it a second life as something you actually want to keep.
The projects below range from beginner-friendly to slightly more advanced. You do not need a dedicated studio — a kitchen counter, a blender you keep for crafts, and a few towels will get you started.
20 Homemade Paper Projects and Resources
1. Instructables : Free step-by-step papermaking guide
What it is: A community-driven project site with dozens of user-submitted tutorials on making paper from recycled materials.
Category: Tutorial hub
Why it stands out: The recycled-paper tutorials include real photos of each stage, from shredding junk mail to pulling a wet sheet off the screen. Many authors list exact pulp-to-water ratios and drying times, which saves beginners a lot of trial and error.
Best for: First-time papermakers who want a visual walkthrough before buying any equipment.
2. Arnold Grummer’s : Papermill kit for consistent results
What it is: A long-running papermaking supplier offering a compact Papermill kit that includes a blender, mould, deckle, and couching sheets.
Category: Equipment and kits
Why it stands out: The kit is designed specifically for home papermakers and works well with shredded junk mail. The included instruction booklet covers pulp preparation and pressing in plain language, and replacement screens are easy to order.
Best for: Crafters who want a ready-to-use setup rather than assembling parts separately.
3. Blender Pulping Method : Fast, smooth pulp from shredded mail
What it is: The most common home technique — shredding paper, soaking it, and blending it into a slurry.
Category: Core technique
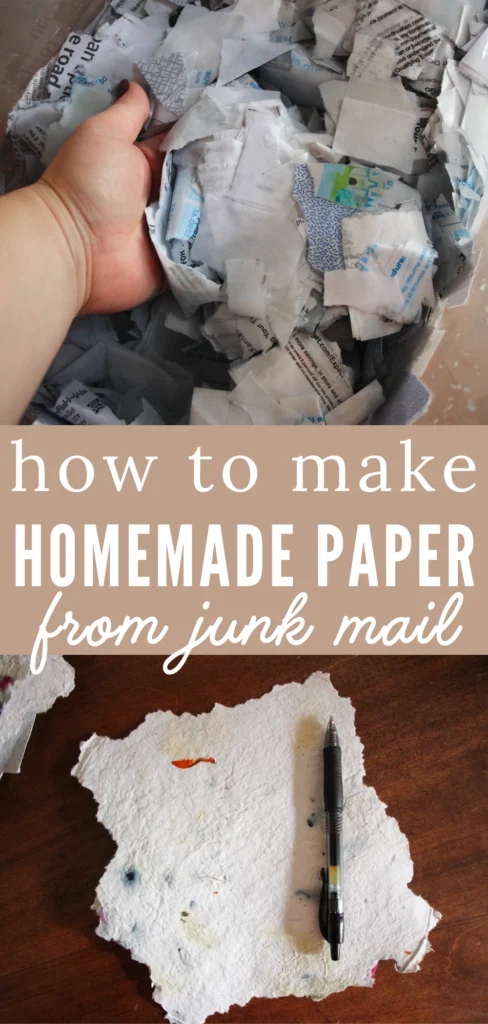
Why it stands out: A standard kitchen blender turns a handful of shredded envelopes into usable pulp in under a minute. The key detail is to use short pulses and add water gradually, since over-blending shortens the paper fibers and produces a weaker sheet.
Best for: Anyone with a blender they are willing to dedicate to crafts.
4. Mould and Deckle Frames : The tool that shapes every sheet
What it is: A pair of wooden frames — one with a screen, one without — used to pull a sheet of pulp from the vat.
Category: Essential equipment
Why it stands out: The deckle controls the thickness and edges of each sheet. Simple wooden frames can be built from scrap lumber and window screening, or bought in standard sizes like 5×7 and 8.5×11 inches. A well-seated screen gives cleaner sheet release.
Best for: Makers who want repeatable sheet sizes for cards and journals.
5. Seed Paper Cards : Plantable paper from junk mail pulp
What it is: Handmade paper embedded with flower or herb seeds that can be planted after use.
Category: Project idea
Why it stands out: You press small seeds into the wet sheet just before drying. The paper becomes a gift that keeps giving — recipients can tear it up and plant it. Use seeds that are small and flat, like basil or poppy, so they embed evenly without tearing the sheet.
Best for: Greeting cards, wedding favors, and eco-friendly gift tags.
6. Pressed Flower Embedded Sheets : Botanical texture in every page
What it is: A technique for layering pressed petals and leaves into wet paper pulp.
Category: Decorative technique
Why it stands out: Junk mail pulp is often plain or speckled, so pressed flowers add instant visual interest. Place them after the sheet is pulled but before pressing, and use a thin second layer of pulp to lock them in. The result looks like expensive stationery.
Best for: Journal covers, bookmarks, and framed art.
7. Kitchen Blender Paper Pulp : Small-batch recycling at home
What it is: A dedicated approach to making pulp in small batches using a kitchen blender and a bucket.
Category: Technique
Why it stands out: Small batches let you experiment with color blending — mixing a blue catalog with white envelopes, for example. Keep a separate blender jar for crafts, since paper pulp can dull blades over time. A 1:4 paper-to-water ratio is a reliable starting point.
Best for: Hobbyists making a few sheets at a time.
8. DIY Paper Ornaments : Holiday decor from recycled sheets
What it is: Shaping damp handmade paper over molds to create ornaments and small decorations.
Category: Project idea
Why it stands out: Press wet paper over a glass or cookie cutter, let it dry, and you have a lightweight ornament with a handmade texture. A coat of clear sealant keeps it sturdy. It is a satisfying way to use up odd-sized scraps that are too small for full sheets.
Best for: Holiday crafting and handmade gift exchanges.
9. Handmade Paper Journals : Bind your own notebook
What it is: Using finished handmade sheets as pages for a stitched or glued journal.
Category: Project idea
Why it stands out: Handmade paper has a tooth and texture that makes journaling feel special. Because junk mail pulp can be slightly acidic, pair it with an acid-free backing sheet if you plan to archive the journal. Simple pamphlet stitching with linen thread holds a small notebook together well.
Best for: Writers and sketchbook makers who want a one-of-a-kind notebook.
10. Papermaking with a Food Processor : Alternative to a blender
What it is: Using a food processor to break down soaked paper into pulp.
Category: Technique
Why it stands out: A food processor handles larger batches than a blender and can produce a chunkier, more textured pulp that some makers prefer. Pulse in short bursts and avoid overfilling the bowl. The trade-off is less uniform fiber length, which shows up as a rougher sheet.
Best for: Makers who want rustic, textured paper and larger batches.
11. Newspaper-to-Notecard Method : Quick cards from everyday paper
What it is: A simplified process for turning newspaper and junk mail into small notecards.
Category: Project idea
Why it stands out: Newspaper pulp dries to a soft gray tone that looks great with a simple stamped or handwritten message. Because notecards are small, you can make a batch in an afternoon using a single mould. Fold them while slightly damp for a clean crease.
Best for: Thank-you notes and quick handmade stationery.
12. Pulp Painting Technique : Create images with colored pulp
What it is: A method of applying different colored pulps to a wet sheet to create pictures or patterns.
Category: Advanced technique
Why it stands out: Junk mail already gives you a palette — blue, red, yellow, and white pulps can be blended into new shades. Use a spoon or squeeze bottle to place colored pulp onto the base sheet, then press gently. It is a forgiving way to make abstract art.
Best for: Crafters ready to move beyond plain sheets.
13. Couching and Pressing Basics : Dry flat sheets without wrinkles
What it is: The step of transferring wet paper onto a felt or cloth and pressing out water.
Category: Core technique
Why it stands out: Proper couching is what separates a smooth sheet from a crumpled one. Lay the wet sheet onto a damp cloth, cover with another cloth, and roll with a rolling pin or press under books. Change the cloths once to speed drying and reduce cockling.
Best for: Anyone frustrated by wavy, uneven results.
14. Sizing for Writing-Friendly Paper : Make your sheets ink-ready
What it is: Adding a sizing agent so handmade paper resists ink bleeding.
Category: Technique
Why it stands out: Recycled paper pulp is absorbent, so fountain pen ink and watercolor can feather. A light application of gelatin or a commercial liquid sizing helps the surface hold a line. Test on a scrap first — too much sizing makes the paper slick.
Best for: Calligraphers and watercolorists using handmade sheets.
15. Confetti and Petal Paper : Festive sheets with built-in texture
What it is: Paper made with confetti, dried petals, or thread snippets embedded in the pulp.
Category: Decorative technique
Why it stands out: It is a playful way to use up tiny scraps and adds a handmade, confetti-like look that photographs well. Keep inclusions small and flat so the sheet still holds together. Thicker inclusions can cause weak spots where the paper tears.
Best for: Party invitations and celebration stationery.
16. Paper Bead Jewelry : Roll scraps into wearable art
What it is: Rolling strips of handmade or junk mail paper into beads for necklaces and bracelets.
Category: Project idea
Why it stands out: Paper beads are lightweight and can be sealed with a clear glaze for durability. Tight, even rolling around a skewer gives consistent bead shapes. It is a great use for leftover strips that are too narrow for sheets.
Best for: Kids’ craft sessions and small handmade gifts.
17. Handmade Paper Gift Wrap : Wrap presents with recycled style
What it is: Using large handmade sheets as gift wrap or as decorative bands around plain paper.
Category: Project idea
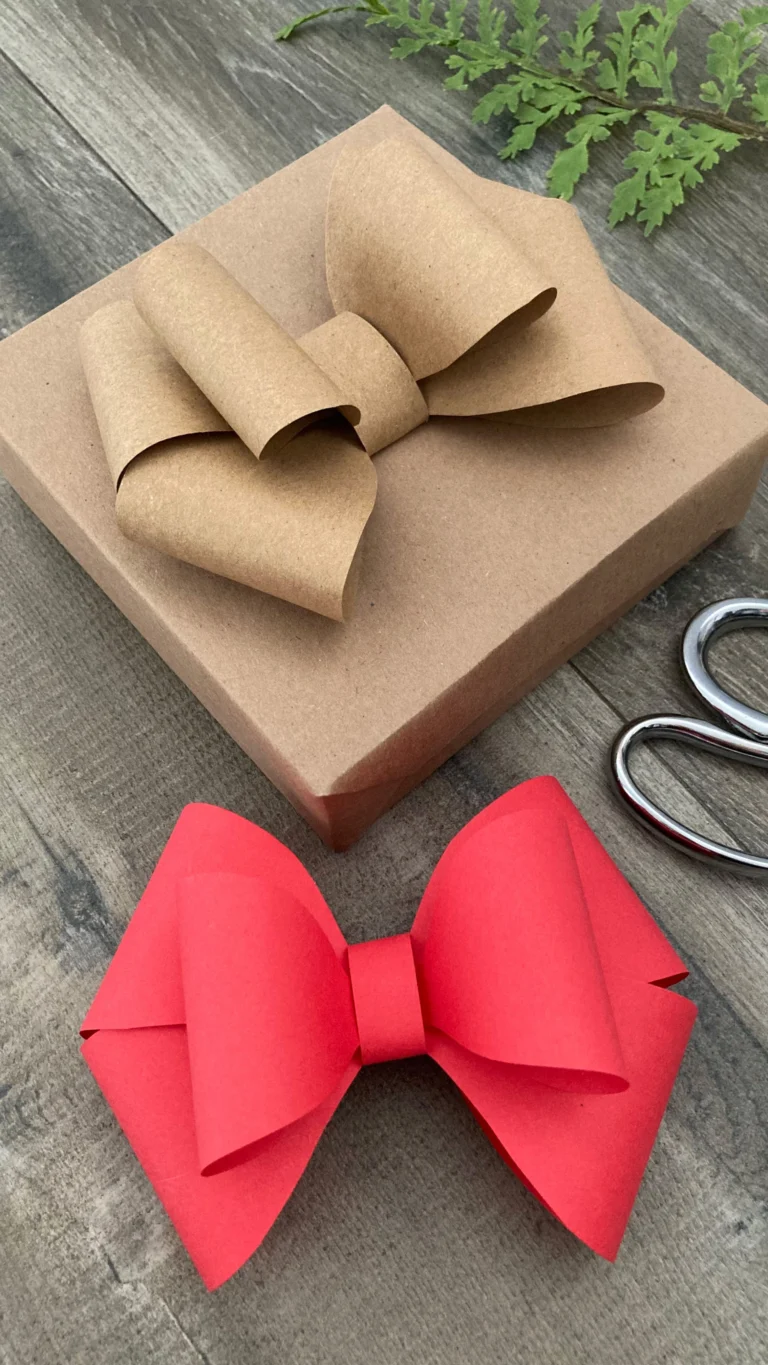
Why it stands out: Large sheets made from junk mail have a natural, speckled look that stands out under a tree or on a table. Because handmade paper is thicker, use tape sparingly and tie with twine instead. It is a thoughtful, low-waste alternative to glossy wrapping paper.
Best for: Eco-conscious gift givers.
18. Paper Bowl and Vessel Molds : Shape wet pulp into 3D objects
What it is: Pressing wet pulp over a bowl or mold to create small vessels and dishes.
Category: Advanced project
Why it stands out: The technique uses a simple bowl covered in plastic wrap as a mold. Build up several thin layers of pulp, press firmly, and let it dry for a day or two. The finished bowl is decorative rather than food-safe, but it makes a striking catch-all tray.
Best for: Crafters who want a sculptural project.
19. Natural Dye Tinting for Pulp : Color your sheets without synthetic dye
What it is: Tinting paper pulp with natural colorants like turmeric, beet juice, or tea.
Category: Technique
Why it stands out: Natural dyes give soft, earthy tones that pair well with the speckled look of recycled paper. Add the dye to the pulp vat and stir before pulling sheets. Colors may fade over time, so keep naturally dyed pieces out of direct sunlight.
Best for: Makers who prefer plant-based materials.
20. Papermaking with Kids : A safe, hands-on family activity
What it is: A simplified papermaking setup designed for children to participate safely.
Category: Family activity
Why it stands out: Kids love the transformation from shredded mail to a real sheet of paper. Pre-blend the pulp yourself, then let children pull sheets and add petals or confetti. Use a plastic tray to contain splashes and keep the work area easy to clean.
Best for: Weekend family crafting and classroom projects.
Bonus: r/papermaking : Community troubleshooting
What it is: A Reddit community where home papermakers share results and ask questions.
Why it stands out: Real users post photos of failed batches and successful sheets, which is genuinely useful when your paper keeps tearing or drying unevenly.
Best for: Beginners who want quick answers from experienced makers.
Bonus: Drying Rack Alternatives : Everyday items that work
What it is: Using cooling racks, window screens, or clotheslines to dry handmade sheets.
Why it stands out: You do not need specialty equipment. A clean window screen propped on blocks lets air circulate underneath and speeds drying without warping.
Best for: Makers without dedicated studio space.
Bonus: Scrap Paper Swap Communities : Trade junk mail for variety
What it is: Local craft groups and online swaps where people exchange paper scraps and handmade sheets.
Why it stands out: Swapping introduces colors and paper types you would not get from your own mailbox, which keeps projects fresh and builds community connections.
Best for: Crafters who want variety without buying new materials.
The Best-Kept Secret in Home Crafting
Homemade paper from junk mail is one of those crafts that looks impressive but costs almost nothing to try. A blender, a screen, and a stack of unwanted envelopes are enough to produce sheets you would happily buy in a boutique. Start with a single small batch, see how the pulp behaves, and then scale up to cards, journals, or gift wrap.
The projects above are meant to be mixed and matched — the same pulp that makes a seed card can become a paper bowl with a little more patience. Keep notes on your ratios and drying times, and each batch will get better than the last.
What is the most unusual piece of junk mail you have turned into something useful? Share your favorite recycled-paper project in the comments below.