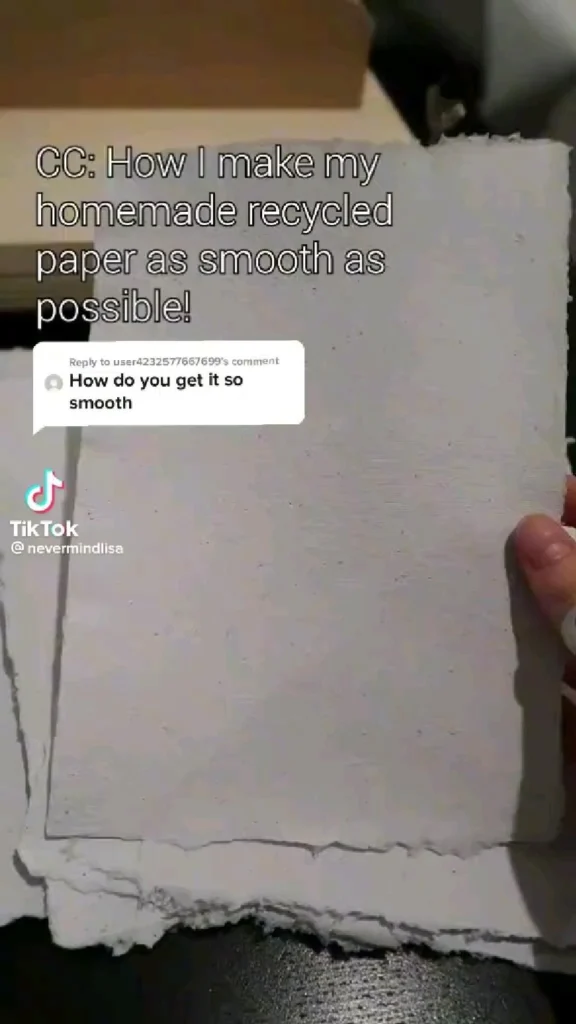
If you have ever pulled a fresh sheet of homemade recycled paper off the screen and watched it dry into a puckered, fuzzy, sandpaper-textured mess, you already know the frustration. The good news: smooth recycled paper is not a matter of luck or expensive equipment. It comes down to a handful of small, repeatable techniques — and a few clever tools that most beginner papermakers never hear about. Below are 19 methods, tools, and finishing tricks that turn lumpy pulp into crisp, marker-friendly sheets you will actually want to write on.
Table of Contents(Click to Toggle)
- Why Smooth Recycled Paper Changes Everything
- 19 Ways to Get Smooth Homemade Recycled Paper
- 1. Arnold Grummer’s Papermaking Kit
- 2. The Blender Pulp Method
- 3. Couching with Smooth Felts
- 4. The Hand Press and Squeegee Trick
- 5. Rolling Pin Pressure Finish
- 6. Sizing with Gelatin or Starch
- 7. Drying Under Weight (Glass and Boards)
- 8. Ironing Between Towels
- 9. Using a Mould and Deckle Properly
- 10. Blending in Small Batches
- 11. Adding a Smoothness Filler
- 12. The Vacuum Table Trick
- 13. Pressing with a Book and Wax Paper
- 14. Beating Pulp Longer
- 15. Using a Papermaking Press
- 16. Water Quality and pH
- 17. Calendering with a Bone Folder
- 18. Drying on Glass or Plexiglass
- 19. The Final Press and Rest
- Bonus Mentions
- The Smoothest Sheets Start With Small Habits
Why Smooth Recycled Paper Changes Everything
Texture is the difference between paper you keep and paper you throw away. Rough, fuzzy recycled sheets drink ink unevenly, snag fine pen tips, and turn marker lines into feathery blobs. Smooth sheets behave like store-bought stock: they take crisp lettering, hold up to watercolor washes when sized, and look genuinely professional in journals, cards, and sketchbooks. The fix is rarely one big change — it is a stack of small refinements in how you blend, press, dry, and finish. Each item below targets one link in that chain, so you can layer several together for a glassy finish. Start with the technique that matches your current setup, then add more as you go.
19 Ways to Get Smooth Homemade Recycled Paper
1. Arnold Grummer’s Papermaking Kit : The beginner-friendly starter that comes with a press and couching felts
What it is: A classic home papermaking kit with a mould and deckle, couching felts, and a small hand press, sold by a long-running papermaking supplier.
Category: Papermaking equipment
Why it stands out: The included press is the single biggest smoothness upgrade over hand-pressing, and the felts are dense enough to leave a fine, even surface instead of a fuzzy one. It also comes with a booklet of technique tips that explain pressing pressure and drying under weight.
Best for: First-time papermakers who want a proven setup rather than piecing together gear.
2. The Blender Pulp Method : Longer blending is the fastest route to a fine, smooth pulp
What it is: A standard kitchen blender used to break soaked scrap paper into a uniform slurry before pulling sheets.
Category: Technique
Why it stands out: Most rough paper comes from under-blended pulp with visible fibers. Blending in short pulses for two to three minutes, until the mixture looks like a smooth milkshake with no chunks, gives a far denser sheet. Use a dedicated blender — paper pulp dulls blades.
Best for: Anyone whose sheets feel lumpy or fibrous after drying.
3. Couching with Smooth Felts : Transfer sheets onto dense felt instead of cloth
What it is: The couching step, where you flip a wet sheet onto a felt or fabric to press and dry.
Category: Technique
Why it stands out: Loosely woven cloth leaves a woven imprint and wicks fibers, creating a rough surface. Dense, smooth felts (or even a clean microfiber cloth) hold the sheet flat and let water drain evenly. Press firmly with a sponge from the back before lifting the mould.
Best for: Papermakers who notice a fabric texture or fuzzy back on their sheets.
4. The Hand Press and Squeegee Trick : Remove water evenly before the sheet ever dries
What it is: A simple technique of pressing a sponge or squeegee across the felt to push out excess water.
Category: Technique
Why it stands out: Sheets that dry slowly with trapped water pucker and cockle. Pressing from the center outward with steady pressure removes water before drying begins, which is a major factor in a flat, smooth finish. A cheap plastic squeegee works as well as a sponge.
Best for: Anyone without a proper press who still wants flat sheets.
5. Rolling Pin Pressure Finish : A kitchen rolling pin gives surprising smoothness
What it is: Rolling a nearly dry sheet with a rolling pin, often between two smooth boards or wax paper.
Category: Technique
Why it stands out: The rolling pin compresses surface fibers and flattens minor bumps without special equipment. Do it while the sheet is slightly damp but not wet — too dry and the fibers crack, too wet and you get ripples. A few passes in each direction is enough.
Best for: Budget setups with no press at all.
6. Sizing with Gelatin or Starch : Seal the surface so ink sits cleanly on top
What it is: A surface treatment (gelatin, cornstarch, or methyl cellulose) applied to finished paper.
Category: Finishing
Why it stands out: Sizing stops ink from bleeding into the fibers, which makes any paper feel smoother and more like commercial stock. A light gelatin wash, brushed on and dried flat, gives a subtle sheen and prevents marker feathering.
Best for: Paper you plan to write or draw on with wet media.
7. Drying Under Weight (Glass and Boards) : Keep sheets flat while they dry
What it is: Drying pressed sheets sandwiched between boards, glass, or heavy books.
Category: Technique
Why it stands out: Free-drying is the number one cause of curl and cockling. Weight flattens the sheet as fibers settle, locking in a smooth surface. Use wax paper as a barrier so the sheet does not stick to your boards.
Best for: Every papermaker — this costs nothing and works immediately.
8. Ironing Between Towels : A quick heat finish for stubborn sheets
What it is: Ironing a damp sheet between clean cotton towels on a low setting.
Category: Technique
Why it stands out: Gentle heat and pressure flatten fibers quickly, and it works well for small batches. Keep the iron on low and never apply direct heat to the paper — the towel barrier prevents scorching and sticking.
Best for: Quick touch-ups on sheets that dried slightly unevenly.
9. Using a Mould and Deckle Properly : Even pulling prevents thin, rough spots
What it is: The traditional frame-and-screen tool used to pull a sheet from the vat.
Category: Technique
Why it stands out: A steady, even pull and a gentle side-to-side shake distribute pulp uniformly. Uneven distribution creates thin patches that dry rough and tear. Dipping slowly and lifting straight up gives the flat, consistent layer that smoothness depends on.
Best for: Anyone whose sheets vary in thickness across the page.
10. Blending in Small Batches : Consistency beats volume every time
What it is: Blending pulp in smaller quantities rather than filling the blender.
Category: Technique
Why it stands out: Overfilled blenders leave clumps that show up as rough spots. Smaller batches blend faster and more evenly, producing a creamier pulp. It takes a little longer, but the surface quality is noticeably better.
Best for: Recycled paper made from mixed scrap with different fiber types.
11. Adding a Smoothness Filler : A pinch of fine material fills surface gaps
What it is: Adding a small amount of fine additive — such as calcium carbonate or a little white office paper — to the pulp.
Category: Technique
Why it stands out: Fillers settle into gaps between fibers, creating a denser, smoother surface. Keep the ratio low (a small percentage of total pulp) so the sheet still holds together. This is a common trick in commercial papermaking adapted for home use.
Best for: Papermakers chasing a more commercial, store-bought feel.
12. The Vacuum Table Trick : Pull water out from below for a denser sheet
What it is: A DIY setup using a vacuum or suction to draw water through the screen.
Category: Technique
Why it stands out: Suction compacts fibers as water leaves, producing a tighter, smoother sheet than gravity drainage alone. It is a more advanced method, but hobbyists build simple versions with a shop vacuum and a sealed box.
Best for: Makers ready to move beyond basic hand-pulling.
13. Pressing with a Book and Wax Paper : The zero-cost press everyone owns
What it is: Stacking damp sheets between wax paper and heavy books.
Category: Technique
Why it stands out: It is free, simple, and effective for small batches. Change the wax paper and blotting layers once or twice in the first hour so moisture escapes, then leave it overnight. The result is flat, even sheets.
Best for: Absolute beginners testing the hobby.
14. Beating Pulp Longer : Time is the quiet secret to fine fibers
What it is: Extending the blending or beating time so fibers break down further.
Category: Technique
Why it stands out: Fibers that are beaten longer become shorter and more flexible, packing together into a smooth surface. This is the core principle behind fine handmade paper. Test a small batch at different times to find your sweet spot.
Best for: Papermakers who want a refined, almost velvety finish.
15. Using a Papermaking Press : Consistent pressure beats guesswork
What it is: A dedicated screw or lever press for squeezing water from stacked sheets.
Category: Equipment
Why it stands out: Even, repeatable pressure flattens sheets uniformly, which hand-pressing rarely achieves. If you make paper regularly, a small press pays for itself in fewer ruined sheets and better texture.
Best for: Regular makers producing batches for journals or cards.
16. Water Quality and pH : Clean water keeps fibers behaving predictably
What it is: Using filtered or distilled water rather than hard tap water.
Category: Technique
Why it stands out: Hard water minerals can interfere with fiber bonding and leave a chalky feel. Filtered water gives more consistent results, and a neutral pH keeps pulp from yellowing over time.
Best for: Anyone in a hard-water area noticing inconsistent batches.
17. Calendering with a Bone Folder : A handheld burnish for a polished surface
What it is: Rubbing a dry sheet with a smooth bone folder or the back of a spoon.
Category: Finishing
Why it stands out: Burnishing compresses the surface fibers into a subtle shine, making the paper feel smoother to the touch and better for fine pen work. Work in steady strokes across the whole sheet.
Best for: Small sheets, cards, and journal pages.
18. Drying on Glass or Plexiglass : A mirror-smooth drying surface
What it is: Laying the wet sheet directly onto glass or plexiglass to dry.
Category: Technique
Why it stands out: The sheet takes on the texture of the surface it dries against. Glass gives a glossy, smooth face on one side. Peel it off gently once fully dry — patience here prevents tearing.
Best for: Paper where one smooth face is enough.
19. The Final Press and Rest : Let pressure do the last bit of work
What it is: A final overnight press of fully dry sheets between boards.
Category: Finishing
Why it stands out: Even dry sheets relax under weight, flattening any remaining curl. Stack them between clean boards with a heavy book on top and leave them for a day. It is the simplest step and often the most satisfying.
Best for: Finishing touches before writing, binding, or gifting.
Bonus Mentions
r/Papermaking Community : Real makers sharing press setups and troubleshooting
What it is: A Reddit community where hobbyists post results and ask questions.
Why it stands out: Threads on smoothness, sizing, and drying are gold for troubleshooting specific problems.
Best for: Getting feedback on a batch that did not turn out as planned.
YouTube Papermaking Tutorials : Watch pressing and couching in real time
What it is: Video walkthroughs of the full papermaking process.
Why it stands out: Seeing pressure and timing in motion explains more than any written guide.
Best for: Visual learners before their first batch.
Etsy Handmade Paper Supplies : Felts, moulds, and sizing kits from small sellers
What it is: A marketplace for handmade papermaking tools and materials.
Why it stands out: Small sellers offer felts and sizing kits you will not find in big-box stores.
Best for: Sourcing niche supplies without a specialty shop nearby.
Pinterest Papermaking Boards : Endless visual inspiration and technique pins
What it is: Curated boards of papermaking ideas and tutorials.
Why it stands out: Great for spotting finishing techniques you have not tried yet.
Best for: Planning your next batch and color experiments.
The Smoothest Sheets Start With Small Habits
Smooth recycled paper is not about one magic tool — it is about stacking small habits. Blend longer, press harder and more evenly, dry under weight, and finish with sizing or burnishing. Start with the free techniques (weighted drying, longer blending, a book press) before investing in equipment, and you will likely see a dramatic improvement in your very first batch. Layer in a press or a proper kit later if the hobby sticks. The best part is that every sheet you make keeps paper out of the recycling bin while giving you a surface that feels genuinely handmade and genuinely usable. Which of these tricks made the biggest difference for your own paper? Share your favorite smoothness secret in the comments — your tip might help the next maker skip the sandpaper stage entirely.