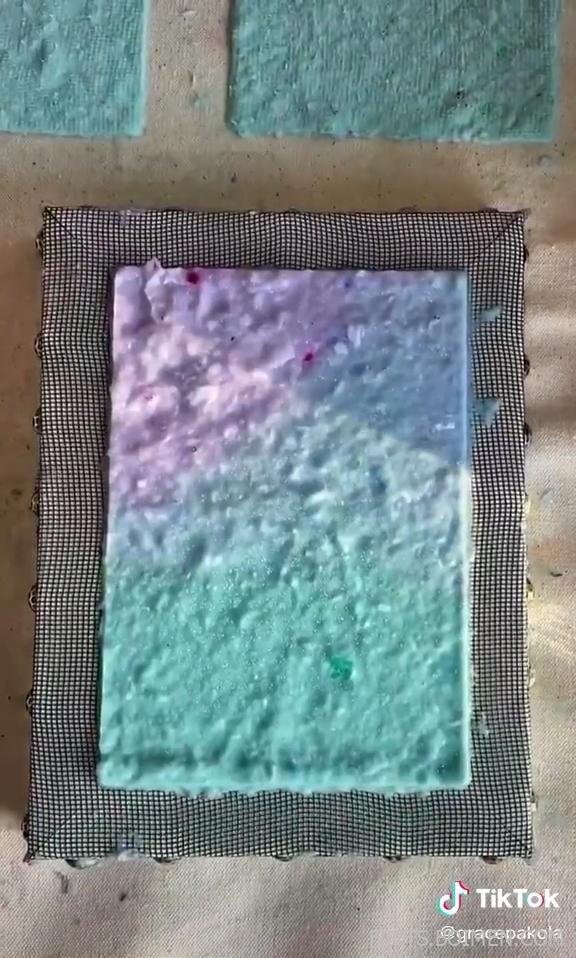
You’ve seen those gorgeous gradient papers on Pinterest—soft fades from blush to cream, or deep indigo melting into sky blue. That’s ombré paper, and it’s surprisingly easy to make at home. Whether you’re into journaling, card-making, or wrapping gifts, this guide reveals 16 clever techniques and tools to create your own stunning gradient papers. From simple food coloring to professional dyes, you’ll find a method that fits your craft style. Let’s dive into the colorful world of DIY ombré paper!
Table of Contents(Click to Toggle)
- Why DIY Ombré Paper?
- The 16 Ways to Make Ombré Paper
- 1. Food Coloring Dip-Dye
- 2. Watercolor Wash
- 3. Ink Pad Blending
- 4. Spray Bottle Technique
- 5. Bleach Gradient
- 6. Alcohol Ink Marbling
- 7. Fabric Dye Soak
- 8. Ombré with Markers
- 9. Natural Dyes from Plants
- 10. Chalk Pastel Rubbing
- 11. Gel Press Printing
- 12. Stencil Sponging
- 13. Dip in Tea or Coffee
- 14. Ombré with Acrylic Paint
- 15. Digital Design & Print
- 16. Crayon Shaving Melt
- Bonus Mentions
- Your Next Ombré Project Awaits
Why DIY Ombré Paper? Because Store-Bought Just Isn’t the Same
Ombré paper adds a personal touch to any project, but pre-made gradient paper can be pricey and limited in color choices. Making your own lets you match exact shades for weddings, scrapbooks, or art pieces. Plus, the process is meditative and fun—each sheet turns out unique. Whether you’re a seasoned crafter or a curious beginner, these methods offer endless possibilities. You’ll never look at plain paper the same way again.
The 16 Ways to Make Ombré Paper
Food Coloring Dip-Dye : The easiest water-based gradient
What it is: Using standard food coloring diluted in water to create a gradient by dipping paper vertically.
Category: Beginner-friendly dyeing
Why it stands out: You probably have food coloring in your kitchen, so there’s zero barrier to entry. The technique involves dipping a sheet of paper into a shallow tray of dye, holding for a few seconds, then lifting slightly to let the color fade. You can achieve beautiful pastels or vivid hues by adjusting the dye concentration. It’s perfect for kids’ crafts or quick projects.
Best for: Quick, low-cost projects and experimenting with color combinations.
Watercolor Wash : Soft, artistic gradients with a brush
What it is: Applying watercolor paints in successive washes to build up an ombré effect.
Category: Painting technique
Why it stands out: Watercolors give you complete control over the gradient’s smoothness. Start with a wet brush, apply pigment at the top, then dip the brush in water and pull the color downward. You can layer multiple hues for a multi-tonal fade. The result is a painterly, organic look that’s perfect for backgrounds in journals or wall art.
Best for: Artists who want a hand-painted feel and subtle transitions.
Ink Pad Blending : Use sponge daubers for precise fades
What it is: Using dye or pigment ink pads and blending tools to apply ink directly onto paper.
Category: Stamping & inking
Why it stands out: This method is beloved by card makers because it’s clean and fast. You tap a sponge dauber onto an ink pad, then apply to the paper in a circular motion, gradually lightening as you move down. Distress Oxide inks are popular because they react with water for a distressed look. You can blend multiple colors seamlessly for a professional finish.
Best for: Card making and scrapbooking where precision matters.
Spray Bottle Technique : Misting for a dreamy, airbrushed effect
What it is: Spraying diluted ink or paint onto paper from a spray bottle to create a soft gradient.
Category: Spray application
Why it stands out: This technique yields a speckled, airy gradient that’s perfect for mixed media. You can control the intensity by the number of sprays and the distance from the paper. Tilt the paper to let the color pool and run, creating organic patterns. It’s a fun way to cover large areas quickly.
Best for: Backgrounds for journaling or mixed-media art.
Bleach Gradient : Reverse ombré on colored paper
What it is: Using diluted bleach to lighten sections of colored paper, creating a gradient from dark to light.
Category: Chemical lightening
Why it stands out: This is a clever twist—start with a vibrant colored paper and use a brush or sponge to apply bleach in a gradient pattern. The bleach removes the color, revealing a lighter shade. It’s essential to work in a well-ventilated area and use gloves. The result is a striking, high-contrast ombré that’s hard to achieve with other methods.
Best for: Bold, dramatic designs on dark or vivid papers.
Alcohol Ink Marbling : Swirling colors for a unique, glossy finish
What it is: Using alcohol inks on glossy paper or synthetic paper, blended with blending solution.
Category: Alcohol ink art
Why it stands out: Alcohol inks are highly pigmented and dry quickly, making them ideal for creating fluid, marbled ombrés. Drop inks onto the paper, then use a straw or air blower to push the colors together. The blending solution creates soft edges and a luminous, glossy finish. It’s addictive and yields one-of-a-kind results.
Best for: Creating jewelry, bookmarks, or decorative art pieces.
Fabric Dye Soak : Full immersion for deep, rich gradients
What it is: Using fabric dye (like Rit) in a water bath to dye paper, controlling the gradient by timing the dip.
Category: Fabric dyeing adapted for paper
Why it stands out: Fabric dyes offer a vast color range and are very concentrated. Mix the dye in a bucket or tray, then dip the paper in slowly—the longer it stays, the darker it becomes. You can create a smooth gradient by gradually pulling the paper out. This method is excellent for large sheets or making wrapping paper.
Best for: Making custom gift wrap or large art sheets.
Ombré with Markers : Direct application with alcohol-based markers
What it is: Using alcohol markers (like Copic or Sharpie) to draw stripes and blend them with a blending pen.
Category: Marker art
Why it stands out: This is a favorite for journaling enthusiasts because it’s portable and easy to control. Draw parallel lines of different shades, then go over with a blender marker to merge the colors. You can achieve smooth gradients in any color scheme. It’s a great way to add ombré accents to planner pages or doodles.
Best for: Detailed, small-scale projects like journaling and card making.
Natural Dyes from Plants : Eco-friendly gradients from beets, turmeric, and more
What it is: Extracting color from natural materials like beets, turmeric, or red cabbage to dye paper.
Category: Natural dyeing
Why it stands out: For an eco-conscious craft, natural dyes are a wonderful choice. Boil plant materials in water to create a dye bath, then dip or paint the paper. The colors are earthy and soft, perfect for rustic-themed projects. Plus, you can compost the leftover plant material—it’s a zero-waste approach.
Best for: Nature-inspired art and sustainable crafting.
Chalk Pastel Rubbing : Dry powder for a velvety fade
What it is: Using chalk pastels to apply pigment to paper, then blending with a finger or tissue.
Category: Dry media
Why it stands out: Chalk pastels give a soft, matte finish that’s ideal for a vintage look. You can scrape the pastel into a powder, dip a cotton ball, and rub onto the paper in a gradient. It’s forgiving—you can erase and reapply. The smudging creates a dreamy, ethereal effect.
Best for: Soft, romantic backgrounds for cards or invitations.
Gel Press Printing : Layer paints on a gel plate for unique pulls
What it is: Using a gel printing plate to apply paint in layers, then pulling a print to transfer the ombré pattern.
Category: Printmaking
Why it stands out: Gel press printing is a fun and experimental way to create ombré paper. Roll out a gradient of paint on the plate, then press paper onto it to transfer the design. You can add stencils or textures for extra interest. Each print is unique, and you can make multiple copies.
Best for: Making custom stationery or art prints.
Stencil Sponging : Build up color through a stencil
What it is: Using a stencil and sponge to apply ink or paint in a gradient pattern.
Category: Stenciling
Why it stands out: This method is great for adding patterns to your ombré paper. Place a stencil over the paper, then sponge on color, moving from dark to light. The stencil creates a crisp design while the sponge blends the colors. You can layer multiple stencils for a complex look.
Best for: Adding decorative motifs to gift wrap or scrapbook pages.
Dip in Tea or Coffee : A sepia-toned gradient with pantry staples
What it is: Using brewed tea or coffee to dye paper, giving it an aged, vintage look.
Category: Natural staining
Why it stands out: If you want a subtle, warm ombré, tea or coffee is perfect. Brew a strong batch, then dip the paper vertically—the longer it sits, the darker it gets. The result is a beautiful sepia fade that’s ideal for vintage-style letters or treasure maps. It’s also a great way to repurpose old paper.
Best for: Antique-themed projects and DIY invitations.
Ombré with Acrylic Paint : Bold, opaque gradients for posters
What it is: Using acrylic paints mixed with water or medium to create a gradient on paper.
Category: Painting
Why it stands out: Acrylics are versatile and come in endless colors. You can paint a gradient by blending two colors directly on the paper or using a palette knife to mix. For a smooth fade, work quickly while the paint is wet. Acrylics are great for larger surfaces and give a vibrant, opaque finish.
Best for: Posters, signs, and bold art pieces.
Digital Design & Print : Create perfect gradients on your computer
What it is: Using design software like Canva or Photoshop to create a digital ombré background, then printing it.
Category: Digital design
Why it stands out: For flawless, repeatable gradients, digital is the way to go. You can choose any colors and adjust the transition to perfection. Print on high-quality paper for a professional result. This method is ideal for invitations, business cards, or any project where you need consistency.
Best for: Professional-looking prints and bulk projects.
Crayon Shaving Melt : Upcycle old crayons for a textured fade
What it is: Shaving crayons and melting the shavings on paper to create a gradient.
Category: Melting technique
Why it stands out: This is a fun, kid-friendly method that repurposes broken crayons. Shave the crayons with a pencil sharpener, sprinkle the shavings on paper, and cover with wax paper. Iron on low heat to melt the shavings, creating a smooth gradient as the colors blend. The texture is unique and adds a playful element.
Best for: Children’s crafts and colorful art projects.
Bonus Mentions
Dharma Trading Co. : A dye supplier with extensive color options
What it is: An online store specializing in fiber-reactive dyes and paper dyeing supplies.
Category: Dye supplier
Why it stands out: If you’re serious about dyeing paper, Dharma offers professional-grade dyes in every color imaginable. They also have tutorials and tips for paper dyeing. Their dyes are highly concentrated, so a little goes a long way.
Best for: Crafters who want a huge color palette.
Jacquard Products : High-quality dyes and inks for paper art
What it is: A brand known for its versatile textile and paper dyes, including Dye-Na-Flow and Lumiere paints.
Category: Dye and paint brand
Why it stands out: Jacquard’s Dye-Na-Flow is a liquid dye that flows beautifully on paper, creating smooth gradients without brush strokes. Their products are archival and lightfast, making them ideal for art that lasts.
Best for: Artists who want professional results.
Michaels Stores : One-stop shop for all your ombré supplies
What it is: A craft store chain with a wide selection of paints, inks, and paper.
Category: Craft retailer
Why it stands out: Michaels carries everything you need for ombré paper, from food coloring to alcohol inks. They often have coupons, making it budget-friendly. Plus, you can find inspiration in their classes and online tutorials.
Best for: Beginners who want to gather supplies in one place.
Ombré Paper Making Kits : Everything in a box for a complete experience
What it is: Pre-assembled kits that include dyes, tools, and paper to make ombré paper at home.
Category: Craft kit
Why it stands out: These kits take the guesswork out of dyeing. They typically include multiple colors, trays, and instructions. It’s a great gift or a way to try the craft without buying everything separately.
Best for: Beginners and gift-givers.
Your Next Ombré Project Awaits
Now you have 16 ways to create ombré paper, plus some bonus resources to explore. Each method offers a unique outcome, from soft watercolor fades to bold acrylics. Start with the simplest—food coloring—or challenge yourself with alcohol inks. The beauty of DIY ombré paper is that no two sheets are exactly alike, making your creations truly one-of-a-kind. So gather your supplies, pick a method, and let your creativity flow. Have you discovered a clever technique for making ombré paper that we missed? Share it in the comments below!