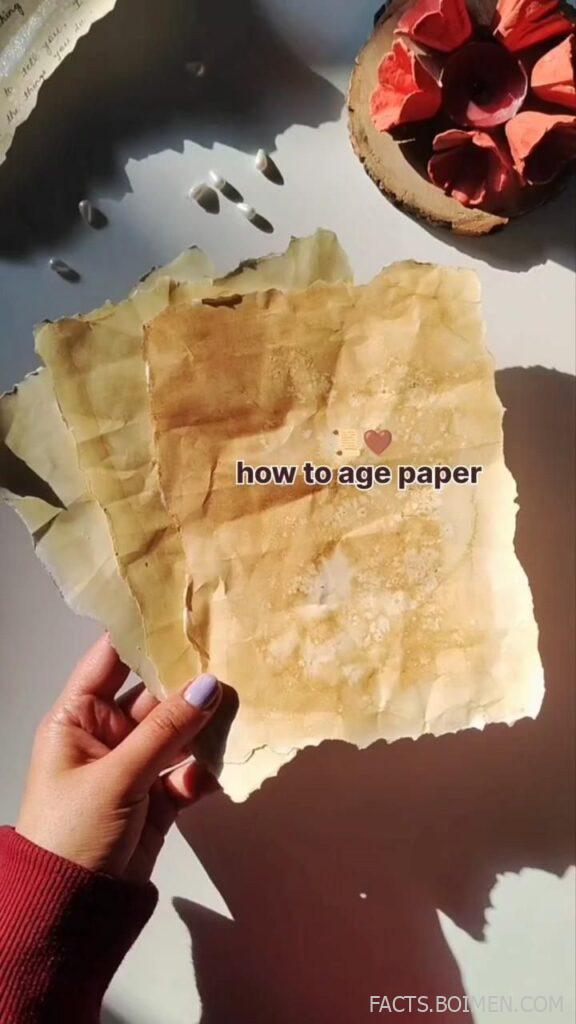
Aging paper is one of those rare craft skills that looks expensive and complicated but is actually built on kitchen ingredients, a little patience, and a few clever tricks. Whether you want a letter that looks like it survived a century in an attic or a journal page with the soft, honeyed glow of an old manuscript, the technique matters less than the finish. Below you’ll find sixteen genuinely useful ways to get that antique look, from the classic coffee-stain method to lesser-known approaches like tea-bag mottling and wax sealing. Each one is beginner-friendly, uses materials you likely already have, and delivers a distinctly different character of age.
Table of Contents(Click to Toggle)
- Why Aging Paper Is Worth Learning
- 16 Techniques for Aging Paper Beautifully
- 1. Coffee-Stain Method
- 2. Black Tea Bath
- 3. Tea-Bag Mottling
- 4. Oven-Baked Aging
- 5. Lemon Juice and Sunlight
- 6. Soy Sauce Wash
- 7. Acrylic Glaze and Watercolor Wash
- 8. Vinegar and Steel Wool Solution
- 9. Distress Ink Blending
- 10. Sandpaper and Edge Wear
- 11. Candle-Smoke and Singed Edges
- 12. Wax Seal and Fold Creases
- 13. Rubber Stamp and Ink Aging
- 14. Parchment Paper and Butter Technique
- 15. Digital Aging and Print
- 16. Layered Mixed-Media Aging
- Bonus Mentions
- The Joy of Slow Paper Crafts
Why Aging Paper Is Worth Learning
Paper is one of the most forgiving materials in the craft world, and that’s exactly why aging it is so satisfying. A single sheet of plain copy paper can be transformed into something that feels like a found artifact in under ten minutes, which makes it perfect for letters, junk journals, scrapbook layouts, and DIY stationery. The appeal goes deeper than aesthetics, though. Aged paper slows you down. It invites you to think about texture, tone, and history, and it pairs beautifully with handwriting, wax seals, and pressed flowers. It’s also remarkably budget-friendly: most of the techniques below cost pennies per sheet and rely on pantry staples rather than specialty supplies. Once you understand how paper fibers absorb pigment, you can control the look precisely and repeat it consistently.
16 Techniques for Aging Paper Beautifully
1. Coffee-Stain Method : The classic warm-brown wash
What it is: A simple bath of brewed coffee or instant coffee dissolved in warm water, brushed or dipped onto paper.
Category: Liquid staining
Why it stands out:
- Produces the most recognizable antique tone, a rich sepia that photographs beautifully
- Dries with natural unevenness, so no two sheets look identical
- Works on printer paper, cardstock, and envelopes alike
Best for: Beginner-friendly vintage letters and journal pages. Use cold coffee for a lighter wash and hot for deeper saturation, and blot with a paper towel to control pooling.
2. Black Tea Bath : A softer, more yellowed finish
What it is: Steeping several black tea bags in hot water, then dipping or brushing the cooled liquid onto paper.
Category: Liquid staining
Why it stands out:
- Gives a gentler, more golden age than coffee, closer to old parchment
- Cheap and repeatable, with predictable results once you dial in the strength
- Pairs naturally with tea-stained envelopes and pressed-flower cards
Best for: Aesthetic paper projects where you want a warm but not muddy tone. Let the tea cool completely before dipping to avoid over-saturating thin paper.
3. Tea-Bag Mottling : Speckled, weathered texture
What it is: Pressing damp tea bags directly onto paper and letting them dry in place.
Category: Texture technique
Why it stands out:
- Creates blotchy, organic spots that mimic water damage and foxing
- Requires no brushes or measuring, just used tea bags
- Layers well with a base coffee wash for extra depth
Best for: Junk journal pages and grungy, well-loved looks. Remove the bags before they fully dry if you want softer edges rather than hard rings.
4. Oven-Baked Aging : Fast, even browning
What it is: Placing paper on a baking sheet in a low oven (around 90 to 120 degrees Celsius) to gently toast the fibers.
Category: Heat technique
Why it stands out:
- Delivers a uniform golden tone in minutes without any liquid
- Works especially well on thicker cardstock and watercolor paper
- Can be combined with a light tea wash for a two-tone effect
Best for: Quick batches of invitations or tags. Keep a close eye on thin paper, which can curl or scorch, and always stay nearby while baking.
5. Lemon Juice and Sunlight : Faded, sun-bleached look
What it is: Brushing diluted lemon juice onto paper and leaving it in direct sunlight to dry.
Category: Natural fading
Why it stands out:
- Produces a pale, washed-out tone that reads as genuinely old
- Uses two household items and zero specialty supplies
- Creates subtle edge fading when applied unevenly
Best for: Delicate, airy aesthetic paper where heavy staining would feel too much. Test on a scrap first, since results vary with paper quality.
6. Soy Sauce Wash : Deep amber character
What it is: A highly diluted soy sauce and water mixture brushed lightly over paper.
Category: Liquid staining
Why it stands out:
- Gives a darker, more dramatic amber than tea or coffee
- Only a few drops are needed, so one bottle lasts for dozens of sheets
- Dries with a slightly glossy sheen that catches the light
Best for: Bold, dramatic aged looks on thick paper. Dilute heavily and test first, because soy sauce is potent and can overwhelm light paper.
7. Acrylic Glaze and Watercolor Wash : Controllable color
What it is: Mixing a small amount of acrylic glaze or watercolor with water and brushing it over the sheet.
Category: Paint technique
Why it stands out:
- Lets you choose the exact shade, from pale sand to deep umber
- Dries evenly and resists smudging once set
- Works beautifully on watercolor paper for a fine-art feel
Best for: Crafters who want repeatable, controlled results. Keep the wash thin so the paper doesn’t buckle, and tape edges down while drying.
8. Vinegar and Steel Wool Solution : Genuine foxing spots
What it is: A traditional recipe of white vinegar and a piece of steel wool left to react, then dabbed onto paper.
Category: Chemistry-based aging
Why it stands out:
- Creates authentic-looking brown spots known as foxing
- Adds a depth of character that washes alone can’t achieve
- Requires only two inexpensive ingredients
Best for: Serious vintage reproduction and antique-style documents. Work in a ventilated space and dab sparingly, since the solution is strong.
9. Distress Ink Blending : Precision edge aging
What it is: Using blending tools and distress ink pads to darken paper edges and corners.
Category: Ink technique
Why it stands out:
- Gives total control over where the age appears, usually at the edges
- Dries instantly, so you can layer and build intensity quickly
- Comes in dozens of vintage shades, from antique linen to walnut stain
Best for: Card makers and scrapbookers who want a clean, deliberate finish. Blend in small circular motions for a soft gradient.
10. Sandpaper and Edge Wear : Physical distress
What it is: Lightly sanding the edges and surface of paper to rough up the fibers.
Category: Physical distressing
Why it stands out:
- Adds tactile texture that photos can’t fully capture
- Makes edges look handled and worn, like a well-loved letter
- Combines perfectly with any liquid stain for a layered effect
Best for: Junk journals and handmade cards. Use fine-grit paper and light pressure so you don’t tear thin sheets.
11. Candle-Smoke and Singed Edges : Dramatic antique finish
What it is: Carefully passing paper edges near a flame to singe them, or holding paper above a candle to catch soot.
Category: Heat and smoke technique
Why it stands out:
- Creates an unmistakably old, treasure-map look
- Adds a smoky scent that enhances the vintage experience
- Works best on thicker paper that resists catching fire
Best for: Fantasy props and pirate-style maps. Always work over a sink or fireproof surface and keep water nearby.
12. Wax Seal and Fold Creases : Handled authenticity
What it is: Folding paper into sections, pressing the creases, and finishing with a wax seal.
Category: Finishing technique
Why it stands out:
- Instantly makes a letter feel like it traveled through time
- Creases add shadow lines that read as genuine wear
- A wax seal elevates even the simplest aged sheet
Best for: Letter writing and invitation sets. Fold along a ruler for crisp lines, then rub the crease with a little coffee for a worn edge.
13. Rubber Stamp and Ink Aging : Instant character marks
What it is: Stamping postmarks, dates, and decorative motifs in faded ink onto aged paper.
Category: Detail technique
Why it stands out:
- Adds storytelling details like postal marks and old dates
- Faded inks look convincingly historical
- Stamps are reusable, making this a great long-term investment
Best for: Ephemera and journal embellishments. Use gray or brown ink rather than black for a softer, aged impression.
14. Parchment Paper and Butter Technique : Old-world translucence
What it is: Rubbing a very thin layer of butter or oil onto paper to create a translucent, parchment-like finish.
Category: Oil technique
Why it stands out:
- Gives paper a soft, slightly see-through quality like old vellum
- Deepens the color of any prior stain
- Creates a subtle sheen that photographs richly
Best for: Decorative overlays and lantern projects. Use sparingly and blot excess oil, since too much can make paper greasy.
15. Digital Aging and Print : Unlimited precision
What it is: Using image editing software to add stains, texture, and tone to a digital file, then printing it.
Category: Digital technique
Why it stands out:
- Lets you preview the exact look before committing ink to paper
- Perfect for batch printing invitations or journal kits
- Combines well with physical techniques for a hybrid finish
Best for: Anyone producing multiple copies. Print on cream or ivory paper to enhance the aged effect.
16. Layered Mixed-Media Aging : The full artisan treatment
What it is: Combining several techniques, such as a tea base, edge ink, sanding, and a wax seal, on one sheet.
Category: Combined technique
Why it stands out:
- Produces the most convincing, multidimensional aged look
- Lets you tailor the finish to each project’s mood
- Showcases your skills and creates truly one-of-a-kind pieces
Best for: Experienced crafters and heirloom projects. Build in thin layers and let each one dry fully before adding the next.
Bonus Mentions
Vintage Typewriter Fonts : Authentic period typography
What it is: Free font libraries offering typewriter, script, and old-print styles.
Category: Typography resource
Why it stands out:
- Instantly adds period authenticity to printed aged paper
- Thousands of free options across every vintage era
Best for: Digital aging projects and printable stationery.
Paper Crimpers : Textured, handmade feel
What it is: Small tools that press a corrugated or ribbed texture into paper.
Category: Texture tool
Why it stands out:
- Adds tactile dimension that flat aging can’t replicate
- Ideal for card fronts and journal covers
Best for: Mixed-media crafters who want texture as much as color.
Wax Seal Kits : The finishing touch
What it is: Sets including a melting spoon, wax beads, and a brass stamp.
Category: Finishing supply
Why it stands out:
- Transforms aged letters into keepsakes
- Endless stamp designs suit every aesthetic
Best for: Letter writers and invitation makers.
Aging Spray Sealers : Protection and depth
What it is: Aerosol or brush-on sealers that deepen color and protect aged paper.
Category: Finishing supply
Why it stands out:
- Prevents smudging and fading over time
- Adds a subtle satin or matte finish
Best for: Projects you plan to display or gift.
The Joy of Slow Paper Crafts
Aging paper is one of those small, quiet crafts that rewards curiosity. You don’t need a dedicated studio or a big budget, just a few pantry staples and the willingness to experiment. Start with the coffee or tea method to build confidence, then layer in edge ink, sanding, or a wax seal as you get comfortable. Each technique teaches you something about how paper behaves, and over time you’ll develop a signature finish that’s entirely your own. The best part is that aged paper makes every handwritten note feel like a small treasure, whether it’s a birthday card or a journal page. Which aging method are you most excited to try first? Share your favorite technique or a discovery of your own in the comments below.