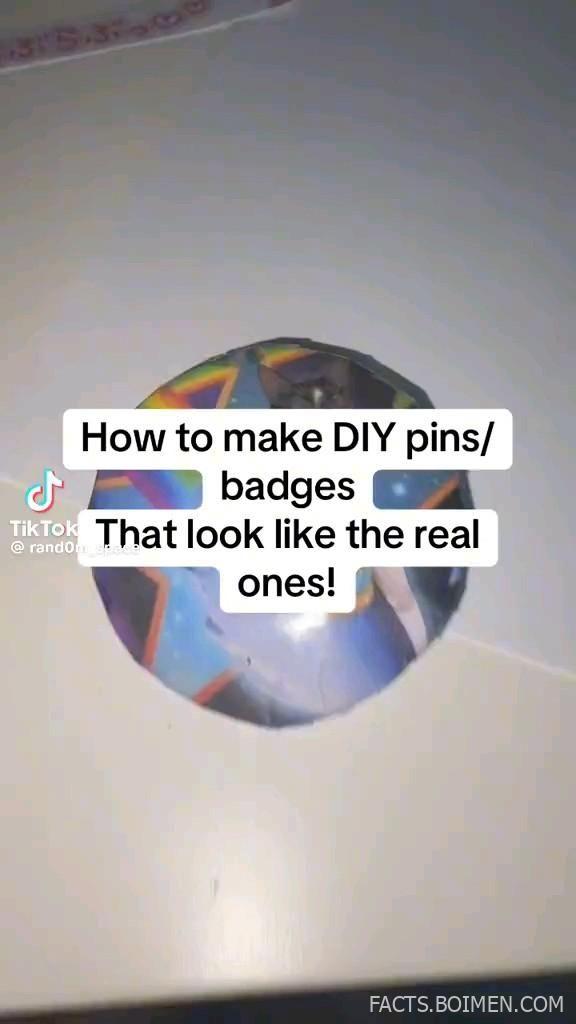
Enamel pins and cloth badges have a way of making a jacket, backpack, or denim vest look instantly collected and personal. The problem is that the real ones cost money, and the cheap knockoffs look flat, plasticky, and obviously fake. The good news is that a small community of crafters has figured out how to fake the look convincingly at home, using resin, shrink plastic, embroidery floss, and a few tools you may already own. This list walks through sixteen approaches, from the resin method that inspired this whole hunt to embroidery, 3D printing, and printable alternatives, so you can pick the technique that matches your budget, patience, and skill level.
Table of Contents(Click to Toggle)
- Why DIY Pins and Badges Are Worth Learning
- 16 Ways to Make DIY Pins and Badges That Look Real
- 1. UV Resin and Bezels
- 2. Shrink Plastic (Shrinky Dinks)
- 3. Hand Embroidery on Felt
- 4. Printable Shrink Sheets
- 5. Bottle Cap Badges
- 6. Polymer Clay Pins
- 7. 3D Printed Pins
- 8. Laser Cut Acrylic
- 9. Button Maker Machines
- 10. Perler Bead Pins
- 11. Punch Needle Badges
- 12. Fabric Paint and Freezer Paper
- 13. Resin Doming on Printed Art
- 14. Wood Burning and Wooden Blanks
- 15. Iron-On Patch Kits
- 16. Upcycled Thrift Store Finds
- Bonus Mentions
- The Best-Kept Craft Secrets for Realistic Pins
Why DIY Pins and Badges Are Worth Learning
Store-bought enamel pins usually start around eight to fifteen dollars each, and limited drops sell out fast. Making your own flips that equation. You get to choose the design, the colors, and the finish, and you can produce a whole set for the price of one retail pin. More importantly, homemade pins let you recreate the exact look of a collectible pin without waiting for a restock or paying resale prices.
The techniques below range from beginner-friendly to moderately involved. Some need a heat source or resin, others just need scissors and a printer. The common thread is that all of them can produce something that reads as a real pin or badge at arm’s length, which is exactly the promise that pulled you here. Start with the method that matches the tools you already have, then branch out as you get comfortable.
16 Ways to Make DIY Pins and Badges That Look Real
1. UV Resin and Bezels : The closest match to real enamel pins
What it is: A clear UV-curing resin poured into a metal bezel or blank pin base, with artwork or colored resin underneath.
Category: Resin craft
Why it stands out:
- Cures under a UV lamp or sunlight in minutes, so you can finish a batch in one sitting
- The domed, glossy surface mimics the smooth enamel finish of manufactured pins
- Works with printed inserts, dried flowers, glitter, or hand-painted details
Best for: Crafters who want the most realistic look and don’t mind working with resin and a UV light. Ventilate your workspace and wear gloves, since uncured resin irritates skin.
2. Shrink Plastic (Shrinky Dinks) : Draw big, bake small, get a hard plastic pin
What it is: A sheet of polystyrene you draw or print on, then bake in a home oven so it shrinks to roughly a third of its size and thickens into a hard plastic token.
Category: Heat-shrink craft
Why it stands out:
- Colored pencils and permanent markers both work, and colors intensify after shrinking
- The finished piece is rigid and glossy enough to pass as a printed acrylic pin
- Cheap to experiment with, since a multi-pack of sheets costs a few dollars
Best for: Beginners and anyone drawing original characters. Bake at the temperature on the package and watch closely, because sheets warp if left in too long.
3. Hand Embroidery on Felt : Soft cloth badges with real texture
What it is: Stitching a design onto felt or cotton, then backing it with interfacing and attaching a pin bar or sew-on backing.
Category: Needlework
Why it stands out:
- Satin stitch and split stitch create clean filled shapes that look professionally made
- Felt edges can be blanket-stitched for a finished border that resists fraying
- No heat or chemicals needed, so it’s a safe project for younger crafters with supervision
Best for: People who enjoy slow, tactile crafts and want badges for jackets, hats, or bags. Use a tight weave felt so the stitches don’t pull through.
4. Printable Shrink Sheets : Turn digital art into pins without drawing by hand
What it is: Inkjet-compatible shrink plastic sheets that let you print a design directly, then bake it down into a pin-sized charm.
Category: Printable craft
Why it stands out:
- Perfect for pixel art, logos, or digital illustrations you already have saved
- Print at 300 percent scale so the design shrinks to your intended size
- Sealing with a clear acrylic spray keeps the ink from scratching off
Best for: Digital artists and designers who want a physical product without learning to draw with markers. Let printed sheets dry fully before baking.
5. Bottle Cap Badges : Upcycled metal that already looks vintage
What it is: Flattened or uncrimped bottle caps filled with a paper circle, sealed with resin or a clear dome sticker, and fitted with a pin back.
Category: Upcycled craft
Why it stands out:
- The crimped metal edge gives an instant retro, collectible look
- Epoxy dome stickers are a no-mess alternative to pouring resin
- Caps are free if you save them from drinks, and blanks are sold in bulk
Best for: Anyone making band-style or retro badges on a near-zero budget. Sand the cap edges if you flatten them, so they don’t snag fabric.
6. Polymer Clay Pins : Sculpted shapes with crisp, matte detail
What it is: Oven-bake clay shaped by hand or with molds, cured, then sealed and glued to a pin back.
Category: Sculpting
Why it stands out:
- Holds fine detail like faces, leaves, and lettering better than most flat methods
- Canes and molds let you repeat the same shape many times for a matching set
- A coat of matte or gloss varnish controls whether the pin looks soft or shiny
Best for: Makers who like working in three dimensions. Cure at the temperature on the package and let pieces cool before handling.
7. 3D Printed Pins : Precise, repeatable, and endlessly customizable
What it is: Designing a pin in free software like Tinkercad or Blender, then printing it in PLA or resin and adding a pin back.
Category: Digital fabrication
Why it stands out:
- Resin printers capture tiny text and thin outlines that FDM printers blur
- You can print a hundred identical pins once the file is dialed in
- Multicolor filament swaps create layered color without painting
Best for: Designers with access to a printer, or anyone willing to use a local library or makerspace. Sand and prime before painting for a smooth finish.
8. Laser Cut Acrylic : Sharp edges and a factory-grade finish
What it is: Cutting and engraving acrylic sheets with a laser cutter, then attaching pin backs to the cut shapes.
Category: Digital fabrication
Why it stands out:
- Engraved lines and cutouts look identical to commercial acrylic pins
- Works with transparent, frosted, and mirrored acrylic for different effects
- Vector files can be reused for stickers and patches too
Best for: Makers near a makerspace or library with a laser cutter. Always follow the facility’s material and ventilation rules.
9. Button Maker Machines : Fast, uniform, and great for sets
What it is: A hand press that crimps a printed circle under a clear mylar cover onto a metal button shell with a pin back.
Category: Press tool
Why it stands out:
- Produces a finished pin in under a minute once the paper is cut
- The clear plastic cover gives a glossy, professional sheen
- Refill shells are inexpensive, making large batches affordable
Best for: Anyone making pins in volume for a club, event, or shop. Cut circles with a matching punch for clean edges.
10. Perler Bead Pins : Pixel art that fuses into a solid badge
What it is: Plastic fuse beads arranged on a pegboard, ironed so they melt together, then backed with a pin.
Category: Fuse bead craft
Why it stands out:
- Ideal for retro game sprites and pixel-style characters
- Beads come in dozens of colors, so gradients are easy to build
- Ironing both sides creates a sturdier, more finished piece
Best for: Gamers and retro fans. Use parchment paper between the iron and beads so they don’t stick to the soleplate.
11. Punch Needle Badges : Chunky, looped texture with a handmade feel
What it is: A hollow needle pushes yarn through fabric to create loops, which are trimmed or left tall for a rug-like surface.
Category: Needlework
Why it stands out:
- Fast coverage compared to traditional embroidery
- The raised loops give badges a cozy, artisanal look that stands out on denim
- Works well for simple shapes, letters, and small motifs
Best for: Crafters who want a soft badge with visible texture. Back finished pieces with felt and glue to lock the loops in place.
12. Fabric Paint and Freezer Paper : Stencil crisp graphics in minutes
What it is: Freezer paper is ironed onto fabric, cut into a stencil, and painted over with fabric paint before peeling away.
Category: Surface design
Why it stands out:
- Produces sharp edges without expensive stencil vinyl
- Layers of paint build opaque, screen-printed-looking color
- Works on canvas, cotton, and felt for sew-on badges
Best for: Beginners who want bold graphic badges. Heat-set the paint with an iron after it dries so it survives washing.
13. Resin Doming on Printed Art : Give paper pins a glassy top coat
What it is: Gluing a printed paper or cardstock cutout to a blank, then doming the top with epoxy or UV resin.
Category: Resin craft
Why it stands out:
- The dome magnifies the artwork slightly, mimicking real enamel depth
- Lets you use any printed image, including photos and text-heavy designs
- Epoxy self-levels, so a steady hand matters less than with paint
Best for: Anyone with a printer and a steady workspace. Work in a dust-free area, since specks trapped in resin are hard to remove.
14. Wood Burning and Wooden Blanks : Rustic pins with real grain
What it is: Pyrography pens burn designs into thin wood slices or laser-cut blanks, which are then sealed and fitted with pin backs.
Category: Woodcraft
Why it stands out:
- Natural grain makes every pin slightly unique
- Burn lines are permanent and won’t fade like ink
- A light oil or varnish deepens the wood tone and protects the surface
Best for: Nature-themed and cottagecore designs. Practice on scrap wood first, since burn depth is hard to undo.
15. Iron-On Patch Kits : Badges that attach without a pin back
What it is: Cutting heat-transfer vinyl or fabric with a digital cutter, then pressing it onto twill or felt to make a sew-on or iron-on patch.
Category: Digital cutting
Why it stands out:
- Layered vinyl creates multicolor designs with clean registration
- Patches can be ironed directly onto jackets and bags
- Design files scale from tiny badges to large back patches
Best for: Makers with a cutting machine who want both pins and patches from one design. Follow the vinyl’s press temperature and peel timing.
16. Upcycled Thrift Store Finds : Repurpose old jewelry into new pins
What it is: Salvaging brooches, earrings, and charms from thrift shops, then converting them into pins with new backs or resin coatings.
Category: Upcycling
Why it stands out:
- Vintage metal components already have a worn, authentic finish
- Costs almost nothing compared to buying new blanks
- One brooch can yield several small pins once disassembled
Best for: Thrifters and anyone who loves a one-of-a-kind look. Clean and degrease salvaged metal before gluing new pin backs on.
Bonus Mentions
Ponoko : Laser cutting on demand
A service that cuts and engraves acrylic or wood from your vector file, useful if you don’t own a laser cutter but want that factory finish.
Adafruit : Electronics-friendly pin supplies
Carries LED components, conductive thread, and small hardware for makers who want light-up or interactive badges.
JOANN : One-stop craft supply runs
Reliable for felt, interfacing, pin backs, resin, and clay in a single trip, with frequent coupons that cut costs further.
r/crafts : Feedback and troubleshooting
A community where you can post a work-in-progress pin and get specific advice on resin bubbles, curling shrink plastic, or paint coverage.
Instructables : Step-by-step project guides
Searchable tutorials for nearly every method above, often with photos of each stage so you can see what the process should look like.
The Best-Kept Craft Secrets for Realistic Pins
The trick to making DIY pins that look real isn’t one magic material, it’s matching the finish to the method. Resin and acrylic give you the glossy, domed look of enamel. Shrink plastic and 3D printing give you hard, precise shapes. Embroidery and punch needle give you texture that no factory pin can replicate. Once you know which finish you’re chasing, the technique almost picks itself.
Start with the cheapest option that fits your tools, make a small batch, and compare it against a store-bought pin on your jacket. Most people find that after two or three tries, the homemade version is indistinguishable at a glance, and it’s entirely your design. That’s the real payoff: a pin nobody else owns, made for a fraction of retail.
Which method are you trying first, and what design do you have in mind? Share your favorite pin-making tip or a supply source you swear by in the comments, so the next crafter can skip the trial and error.