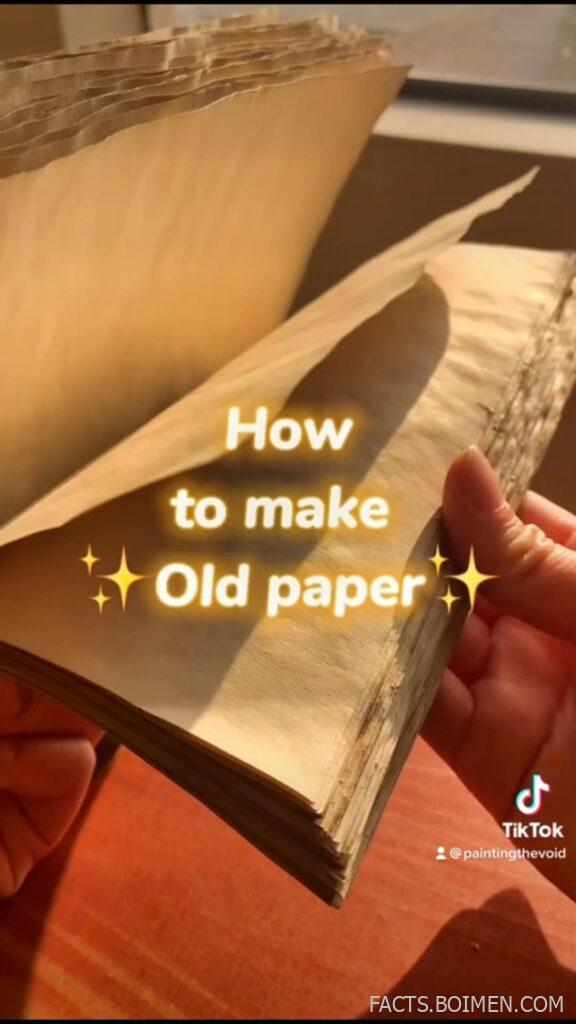
There is something irresistible about a sheet of paper that looks like it survived a century in an attic. The coffee-stain trick that made the rounds on TikTok is genuinely fun, but it is only the first rung of a surprisingly deep ladder. Below you will find fifteen real, repeatable methods for how to make old paper at home, ranked from the classic coffee wash to wax, tea, and even sun-fading techniques. Each one lists what it is, how it behaves, and the exact kind of project it suits best. Grab your paper, your cheapest instant coffee, and let a little controlled chaos do the rest.
Table of Contents(Click to Toggle)
- Why Aging Paper Is Worth Learning
- 15 Ways to Make Old Paper at Home
- 1. Coffee Wash
- 2. Black Tea Stain
- 3. Rooibos and Herbal Decoctions
- 4. Soy Sauce Wash
- 5. Walnut Ink Dye
- 6. Acrylic Paint Glaze
- 7. Watercolor Wash
- 8. Oven Baking Method
- 9. Sun Fading
- 10. Candle Singeing
- 11. Sandpaper Distressing
- 12. Wax Seal and Crumple
- 13. Chalk and Pastel Dusting
- 14. Ink Splatter and Blot Technique
- 15. Layered Combination Aging
- Bonus Mentions
- The Best Paper Aging Tricks So Far
Why Aging Paper Is Worth Learning
Aged paper is one of the cheapest special effects in the world. A single sheet costs pennies, yet a well-aged page instantly changes the mood of a journal spread, a wedding invitation, a treasure-hunt map, or a prop letter. The TikTok coffee method works because it mimics real oxidation: paper yellows over time as lignin breaks down and reacts with light and air. Once you understand that principle, you can fake decades of aging in minutes using dyes, heat, abrasion, and light. The fifteen techniques below range from a two-minute coffee soak to a slow sun-fade that takes a full afternoon, so you can match the method to your project, your patience, and what is already sitting in your kitchen cupboard.
15 Ways to Make Old Paper at Home
1. Coffee Wash (the @paintingthevoid Method) : The classic two-minute vintage trick
What it is: The method that launched a thousand recreations: brew strong instant coffee, let it cool, and either brush or dip the paper until it takes on a warm sepia tone.
Category: Liquid staining
Why it stands out: It is the fastest route to convincing old paper, and the supplies cost next to nothing. The TikTok trick works best with a cheap dark-roast instant coffee mixed at roughly double strength, brushed on with a wide foam brush so the tone stays even. Let it dry flat, then press the sheet under a heavy book overnight to flatten the ripples.
Best for: Beginner journalers, quick prop letters, and anyone who clicked the pin and wants to start within five minutes.
2. Black Tea Stain : A cooler, redder vintage tone
What it is: Steep three or four black tea bags in hot water, let the liquid cool, and sponge it onto the paper.
Category: Liquid staining
Why it stands out: Tea gives a slightly cooler, redder brown than coffee, which reads as older and more European. The tannins also deepen over the first hour of drying, so the sheet keeps evolving after you set it down. Brush the tea on, let it sit for two minutes, then blot the edges with a paper towel for that uneven, water-damaged look.
Best for: Letters, diaries, and anything meant to look like a Victorian document rather than a modern craft.
3. Rooibos and Herbal Decoctions : Warm amber without the caffeine smell
What it is: Use rooibos, chamomile, or hibiscus tea instead of black tea for a softer, more amber-toned stain.
Category: Liquid staining
Why it stands out: Rooibos delivers a warm honey-amber that sits beautifully on cream cardstock, and it does not carry the bitter coffee aroma that lingers on finished projects. Hibiscus pushes toward a faint rosy hue, which is perfect for romantic or botanical-themed pages. Steep longer for a deeper tone, and test on a scrap first because herbal teas vary widely in strength.
Best for: Wedding stationery, botanical prints, and projects where a subtle scent matters.
4. Soy Sauce Wash : Deep, dramatic, high-contrast aging
What it is: A diluted soy sauce wash that produces a dark, almost leathery brown in a single pass.
Category: Liquid staining
Why it stands out: This is the shortcut for anyone who wants dramatic results without layers. Mix one part soy sauce with three parts water, dab it on with a sponge, and watch the paper darken almost immediately. The catch: it smells strongly while wet and can leave a faint salt residue, so keep it away from projects that will be handled heavily.
Best for: Treasure maps, pirate props, and Halloween projects that need a bold, theatrical look.
5. Walnut Ink Dye : The artist-grade antique brown
What it is: A concentrated walnut-hull ink, sold as a powder or liquid, diluted in water and brushed onto paper.
Category: Artist pigment
Why it stands out: Walnut ink is what professional calligraphers and bookbinders use when they need authentic antique browns. It is lightfast, mixes predictably, and layers without turning muddy, so you can build from pale parchment to deep sepia in controlled passes. A small bottle lasts for dozens of sheets, making the cost per page surprisingly low.
Best for: Calligraphy, illuminated manuscripts, and any project where color quality genuinely matters.
6. Acrylic Paint Glaze : Full control over the exact shade
What it is: A very thin wash of raw umber, ochre, or burnt sienna acrylic paint mixed with water.
Category: Paint wash
Why it stands out: Unlike coffee or tea, acrylic lets you dial in the precise vintage tone you want before you touch the paper. Mix a pea-sized dab with a cup of water, test on a scrap, and adjust until it matches your reference. Because acrylic is water-resistant once dry, the finished page will not reactivate if you later add wet media on top.
Best for: Mixed-media artists who plan to paint, stamp, or glue over the aged paper afterward.
7. Watercolor Wash : Soft, translucent parchment tones
What it is: A wet-on-wet wash of yellow ochre, sepia, and a touch of burnt sienna watercolor.
Category: Paint wash
Why it stands out: Watercolor granulates and settles in a way that mimics the uneven foxing of genuinely old paper. Wet the sheet first, drop in the color, and let it bloom naturally rather than brushing it flat. A sprinkle of salt while damp creates tiny pale speckles that look exactly like age spots.
Best for: Delicate pages, poetry journals, and anyone who wants a painterly rather than stained finish.
8. Oven Baking Method : Dry, crisp, authentically brittle
What it is: A low-temperature bake that browns the paper itself rather than staining it.
Category: Heat aging
Why it stands out: Heat actually changes the paper’s color at a chemical level, producing a dry, crisp result that stains cannot match. Place sheets on a baking tray at around 90 degrees Celsius for five to ten minutes, watching constantly because the line between aged and scorched is thin. Always keep a fire extinguisher nearby and never leave the oven unattended.
Best for: Props that need to feel brittle and dry, and anyone who wants a stain-free aged finish.
9. Sun Fading : Slow, natural, zero chemicals
What it is: Taping paper to a sunny window for several days to let UV light yellow it naturally.
Category: Light aging
Why it stands out: This is the only method that perfectly replicates real aging, because it uses the exact same mechanism. Place a sheet in direct sun for three to seven days and the lignin in the paper yellow naturally. Cover parts with objects to create sun-faded silhouettes, which is a gorgeous effect for botanical or architectural prints.
Best for: Patient crafters, silhouette art, and projects where authenticity matters more than speed.
10. Candle Singeing : Burnt edges with real character
What it is: Carefully passing the edges of a sheet over a candle flame to brown and curl them.
Category: Fire aging
Why it stands out: Nothing fakes a treasure map like genuinely charred edges. Hold the paper with tongs, move it in slow arcs, and let the flame lick only the very edge. The paper will curl and brown unevenly, which is exactly the point. Do this over a sink or metal tray, keep a spray bottle of water nearby, and never attempt it with thin tissue paper.
Best for: Pirate maps, fantasy props, and Halloween invitations that need theatrical drama.
11. Sandpaper Distressing : Worn edges and soft corners
What it is: Lightly sanding the edges and surface of paper to thin it, soften corners, and create a handled, worn look.
Category: Physical distressing
Why it stands out: Real old paper is rarely pristine, and sandpaper is the fastest way to fake that handling. Use 220-grit along the edges and 400-grit for a gentle surface scuff. Combine it with a coffee wash and the result looks genuinely handled rather than freshly stained. Work over a bin because the dust gets everywhere.
Best for: Journals, letters, and any project that should look carried around in a pocket for years.
12. Wax Seal and Crumple : Texture that reads as history
What it is: Crumpling the stained sheet, flattening it, and finishing with a wax seal or wax-rubbed surface.
Category: Texture finishing
Why it stands out: Crumple the dried sheet into a tight ball, then gently unfold it and press it flat. The creases catch the light and instantly suggest a letter that traveled by post. A light rub of beeswax over the surface adds a subtle sheen that mimics the patina of handled paper, and a wax seal on the fold completes the illusion.
Best for: Love letters, invitations, and any project that needs a tactile, three-dimensional finish.
13. Chalk and Pastel Dusting : Soft, dusty, foxed speckles
What it is: Scraping chalk or soft pastel into a fine dust and pressing it onto damp stained paper.
Category: Dry pigment
Why it stands out: Foxing, those small brown spots on antique paper, is one of the hardest details to fake convincingly. Chalk dust pressed into a slightly damp surface creates speckles that look genuinely organic. Use a soft brush to scatter the dust, then fix it with a light mist of hairspray so it does not rub off on your hands.
Best for: Antique book pages, botanical prints, and anyone chasing that authentic foxed look.
14. Ink Splatter and Blot Technique : Handwritten history in a bottle
What it is: Flicking diluted brown ink onto the page and pressing it with a paper towel for blotchy, water-damaged marks.
Category: Ink effects
Why it stands out: Old documents are rarely clean, and ink splatter tells the story of a quill pen that misbehaved. Mix brown fountain-pen ink with water, load an old toothbrush, and flick from a distance. Blot some of the spots while wet for soft edges, and leave others to dry sharp for contrast. The result is a page that looks genuinely written on, not decorated.
Best for: Letters, manuscripts, and any project that needs a human, imperfect touch.
15. Layered Combination Aging : The professional finish
What it is: Stacking two or three techniques, for example a coffee base, a tea mid-tone, and a sandpaper edge, then sealing with matte medium.
Category: Advanced finishing
Why it stands out: This is how prop makers and bookbinders get results that fool people. Start with a pale coffee wash, add a tea layer for depth, distress the edges, then seal with a thin coat of matte Mod Podge so the page stays flexible and does not smudge. The layering mimics the uneven, multi-cause aging of real paper, and the seal makes it durable enough to handle.
Best for: Props, gifts, and anyone ready to move beyond the basic TikTok trick into genuinely convincing results.
Bonus Mentions
Tim Holtz Distress Ink : Pre-mixed vintage tones for fast backgrounds
These ink pads, especially in Vintage Photo and Antique Linen, are a staple in scrapbooking for a reason. Swipe, blend with a foam tool, and you get a controllable aged background in seconds without any liquid mess.
Hairspray Fixative : The budget seal for chalk and pastel
A light mist of ordinary aerosol hairspray locks chalk dust and soft pastel in place without changing the paper’s texture. Hold the can at least 30 centimeters away and mist in thin passes.
Paper Doilies and Stencils : Patterned aging with negative space
Lay a doily over the sheet before staining and the pattern resists the dye, leaving delicate pale shapes. It is a beautiful trick for wedding and botanical projects.
Embossing Powder : Raised details that look antique
Gold or copper embossing powder on aged paper produces raised, metallic details that read as old-fashioned letterpress. Stamp, sprinkle, and heat gently.
Wax Seal Kits : The finishing touch on any aged letter
A single wax seal transforms a folded aged sheet into something that looks like it came from a trunk in the attic. Choose deep reds or antique golds for the most convincing vintage look.
The Best Paper Aging Tricks So Far
Every method above starts from the same insight: old paper is not one color but a layered history of stains, light, and handling. The coffee wash that brought you here is a perfect entry point, but the real magic happens when you stack techniques, a pale tea base, a sanded edge, a splatter of ink, a wax seal. Start with one method, test it on a scrap, and build from there. The supplies are cheap, the mistakes are fixable, and the results are genuinely lovely. Which technique are you trying first? Share your favorite paper-aging trick or a photo of your best result in the comments below.