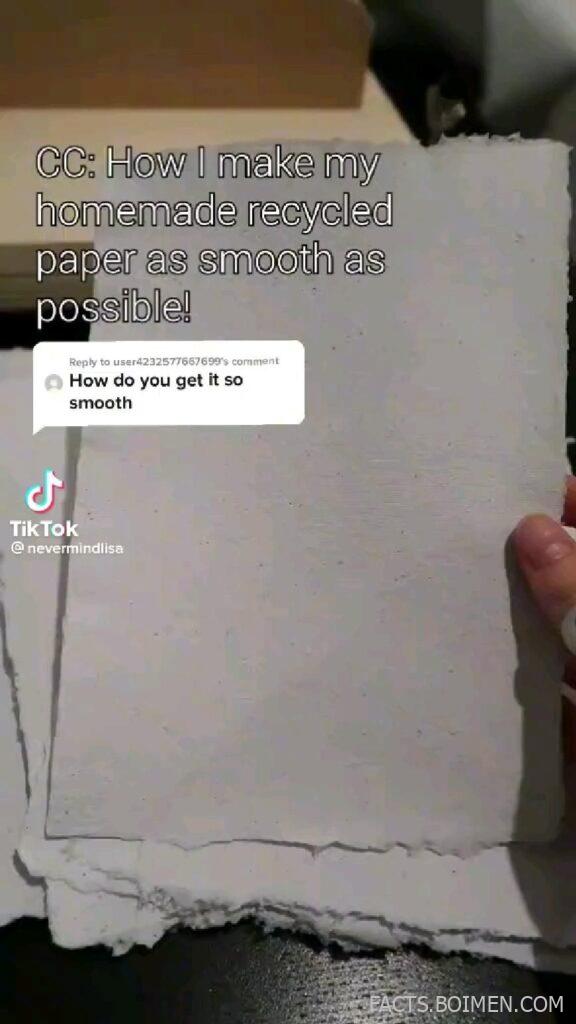
Making your own recycled paper at home is deeply satisfying, but getting a smooth, professional finish can feel like a secret society. After countless batches and a viral TikTok demo by @nevermindlisa, we’ve rounded up 17 techniques, tools, and add-ins that turn rough, pulpy sheets into velvety stationery. Whether you’re a beginner or a seasoned paper maker, these methods will help you achieve that coveted smooth texture.
Table of Contents(Click to Toggle)
- Why Smooth Paper Matters
- 17 Techniques for Smooth Recycled Paper
- 1. Blender
- 2. Arnold Grummer’s Paper Making Kit
- 3. Pour Mold
- 4. Couching Sheets
- 5. Sponge
- 6. Rolling Pin
- 7. Iron
- 8. Parchment Paper
- 9. Bone Folder
- 10. Calender Machine
- 11. Sizing Agent
- 12. Retention Aid
- 13. Formation Aid
- 14. Pressing Stack
- 15. Drying Boards
- 16. Smoothing Techniques
- 17. Paper Making Community
- Bonus Mentions
- The Secret to Silky Smooth Recycled Paper
Why Smooth Paper Matters (And How to Get It)
Homemade recycled paper often has a rustic, uneven texture that’s charming for crafts but frustrating for writing or printing. The difference between rough and smooth comes down to fiber preparation, pressing, and drying. In this guide, we’ll explore 17 tools and techniques that address each stage of the process. From blending your pulp to a fine consistency to using a calendering machine, these methods will help you produce paper that rivals store-bought. Plus, we’ll share bonus mentions for those who want to dive even deeper. Let’s get started!
17 Techniques for Smooth Recycled Paper
1. Blender : The key to fine pulp
What it is: A high-speed blender used to break down recycled paper into a fine pulp.
Category: Equipment
Why it stands out: The consistency of your pulp directly affects the smoothness of the final sheet. A powerful blender like a Vitamix or Ninja can reduce paper to individual fibers, eliminating clumps that cause rough texture. For best results, blend soaked paper in small batches with plenty of water.
Best for: Beginners and anyone who wants a smooth base pulp without investing in a Hollander beater.
2. Arnold Grummer’s Paper Making Kit : Complete starter kit for smooth paper
What it is: A all-in-one paper making kit that includes a mold and deckle, couching sheets, and instructions.
Category: Kit
Why it stands out: This kit is designed for home paper makers and includes a specially designed screen that helps drain water evenly, reducing surface irregularities. The included DVD walks you through techniques to achieve a smooth finish.
Best for: Newcomers who want a proven system without piecing together supplies.
3. Pour Mold : Even thickness from the start
What it is: A mold with a removable deckle that allows you to pour pulp evenly.
Category: Equipment
Why it stands out: Unlike dip molds, pour molds let you control the amount of pulp, resulting in uniform thickness. A smooth surface starts with an even layer of pulp. Look for molds with a fine mesh screen (around 100 mesh) to catch fibers while letting water drain quickly.
Best for: Paper makers who want consistent, smooth sheets every time.
4. Couching Sheets : Transfer without disturbing the surface
What it is: Absorbent sheets (often felt or interfacing) used to transfer wet paper from the mold to a pressing stack.
Category: Material
Why it stands out: The texture of your couching sheet can imprint on the paper. Using smooth, non-woven interfacing or felt prevents unwanted patterns. Dick Blick offers a variety of felts specifically for paper making.
Best for: Ensuring the paper’s surface remains smooth during handling.
5. Sponge : Controlled water removal
What it is: A large, dense sponge used to press water out of the newly formed sheet.
Category: Tool
Why it stands out: Gently sponging the surface removes excess water without disturbing the fibers. This step is crucial for preventing shrinkage cracks and uneven drying. Use a car washing sponge or a grout sponge for best results.
Best for: DIY paper makers who want to avoid a wet, blotchy finish.
6. Rolling Pin : Pressing without a press
What it is: A simple rolling pin used to press water out of the paper stack.
Category: Tool
Why it stands out: If you don’t have a paper press, a rolling pin can apply even pressure to flatten the fibers. Roll in multiple directions to ensure uniform smoothness. It’s a cheap, effective alternative.
Best for: Budget-conscious crafters.
7. Iron : Heat-set for a glossy finish
What it is: A household iron used to dry and smooth the paper.
Category: Tool
Why it stands out: Ironing the paper between two sheets of parchment paper on a low setting can flatten fibers and give a smooth, almost glossy surface. This technique is often used after the paper is mostly dry.
Best for: Quick smoothing of small batches.
8. Parchment Paper : Non-stick protection
What it is: A heat-resistant paper used to prevent sticking during ironing or pressing.
Category: Material
Why it stands out: When ironing or pressing, parchment paper prevents the paper from sticking to the iron or press plates. It also imparts a subtle sheen. Reynolds Kitchens offers reliable parchment that won’t leave residue.
Best for: Protecting your paper and equipment during heat treatments.
9. Bone Folder : Burnishing for a polished look
What it is: A smooth, curved tool used to crease and burnish paper.
Category: Tool
Why it stands out: Rubbing a bone folder over the surface of dry paper compresses the fibers and creates a smooth, shiny finish. It’s a manual calendering technique that works well for small sheets.
Best for: Adding a professional touch to handmade cards and invitations.
10. Calender Machine : Professional smoothness at home
What it is: A machine with rollers that press paper to a smooth finish.
Category: Equipment
Why it stands out: Calendering is the industrial secret to smooth paper. Small calender machines, like those from Paper Circle, use pressure and sometimes heat to flatten fibers. This is the ultimate step for a commercial-grade smoothness.
Best for: Serious paper makers willing to invest in equipment.
11. Sizing Agent : Seals the surface
What it is: A liquid added to pulp or applied to finished paper to make it less absorbent.
Category: Additive
Why it stands out: Without sizing, ink bleeds and paper feels rough. Adding a sizing agent like methylcellulose or gelatin to your pulp creates a smoother writing surface. It also strengthens the paper.
Best for: Paper intended for writing or printing.
12. Retention Aid : Keeps fibers together
What it is: A chemical additive that helps fine fibers and fillers stay in the sheet.
Category: Additive
Why it stands out: When you blend paper, many fine fibers are lost in the water. A retention aid helps them bind to the sheet, resulting in a denser, smoother paper. It’s especially useful when adding calcium carbonate as a filler.
Best for: Achieving a more uniform, less porous sheet.
13. Formation Aid : Disperses fibers evenly
What it is: A natural additive (like okra or cactus mucilage) that slows water drainage.
Category: Additive
Why it stands out: Formation aid prevents fibers from clumping, leading to a more even distribution and a smoother surface. It’s a traditional technique used in Japanese paper making.
Best for: Paper makers dealing with long fibers or wanting a very even sheet.
14. Pressing Stack : Even pressure for flatness
What it is: A stack of boards and weights used to press water out of the paper.
Category: Equipment
Why it stands out: A proper pressing stack (alternating felt and boards) applies even pressure, flattening the paper and removing excess water. This step is critical for preventing cockling (wavy edges). Use heavy books or a press for best results.
Best for: Ensuring flat, smooth sheets after couching.
15. Drying Boards : Controlled drying prevents warping
What it is: Absorbent boards on which paper is dried under weight.
Category: Equipment
Why it stands out: Drying paper between boards (like plywood or MDF) with weights on top keeps it flat as it dries. This method, called restraint drying, is key to a smooth, unwrinkled finish.
Best for: Preventing curled edges and achieving a professional look.
16. Smoothing Techniques : Tips from the community
What it is: A collection of methods shared by paper makers online.
Category: Resource
Why it stands out: From using a rolling pin with a towel to ironing with wax paper, the paper making community has countless tricks for smoothness. WikiHow offers a comprehensive guide that aggregates these techniques.
Best for: DIY enthusiasts looking for free, practical advice.
17. Paper Making Community : Learn from others
What it is: Online forums and social media groups dedicated to paper making.
Category: Community
Why it stands out: The r/papermaking subreddit is a treasure trove of tips, including how to get smooth paper. Members share their setups, troubleshoot problems, and celebrate successes. It’s a supportive place to ask questions.
Best for: Ongoing learning and inspiration.
Bonus Mentions
-
Papermaking.com : Supplies and tutorials
-
YouTube : Video guides for visual learners
-
Pinterest : Inspiration and DIY hacks
-
Etsy : Buy handmade paper for reference
-
Amazon : One-stop shop for tools
The Secret to Silky Smooth Recycled Paper
Achieving smooth homemade recycled paper is a blend of art and science. By focusing on fine pulp, even pressing, and controlled drying, you can transform rough sheets into beautiful, writable paper. Remember, the journey is as rewarding as the result. Which of these techniques are you excited to try? Share your own tips in the comments below!