Advertisements
21 Magical Pumpkin Carving Ideas to Transform Your Porch into a Spooky Paradise
When the leaves turn crisp and the days shorten, there’s a palpable excitement in the air. But if your porch looks more drab than fab, it’s time to conjure up some enchanting pumpkin magic! You know that feeling when your home feels more blah than boo? Let’s change that.
In this article, I’ll share 21 pumpkin carving ideas that will elevate your porch from mundane to mysterious. You won’t just be spooking the neighbors; you’ll be creating an enchanting autumnal haven that everybody will want to visit. Ready to carve out some magic? Let’s dive in!
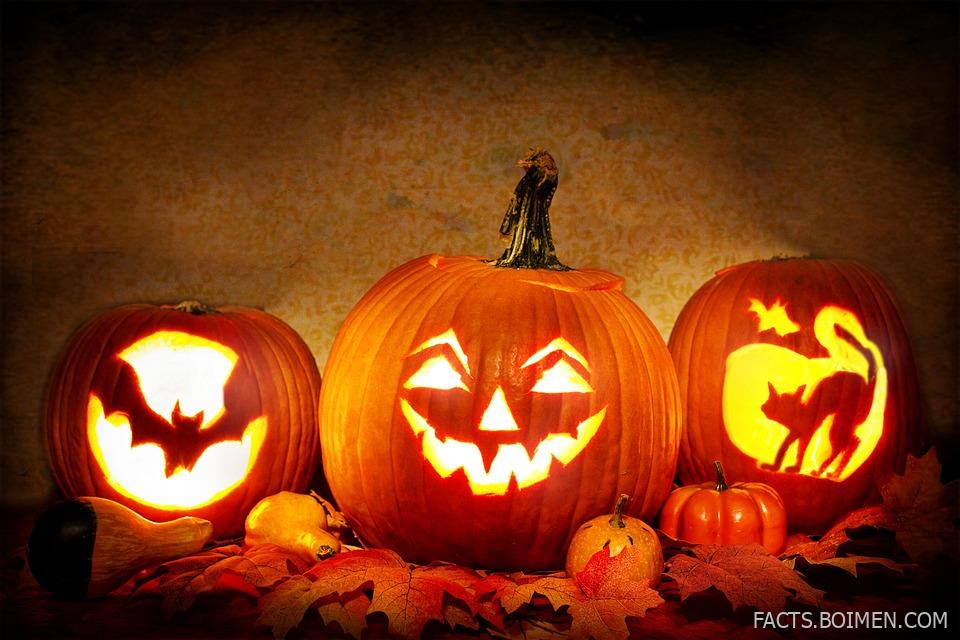
1. Classic Jack-O’-Lantern
Explanation: The timeless classic, with simple eyes and a ghoulish grin.
Benefit: Instantly recognizable and invokes a sense of nostalgia.
Example: Set up a row of these cuties on your porch steps for an eye-catching display.
2. Scary Silhouettes
Explanation: Carve the outline of bats, cats, or ghosts to cast eerie shadows.
Benefit: Creates a spooky ambiance especially when illuminated with a candle inside.
Example: Position these on a table near the front door for an inviting fright.
3. Whimsical Faces
Explanation: Forget the scary! Go for quirky and fun with bright expressions.
Benefit: Great for families; it brings smiles instead of screams!
Example: Use a variety of colors to paint the pumpkins after carving for extra flair.
4. Glowing Eyes
Explanation: Carve out eyes and place small LED lights inside.
Benefit: Instant spooky effect, perfect for a dark, moonlit night.
Example: Put them in your windows or yard for a ghostly effect that dazzles.
5. Pumpkin Family Portraits
Explanation: Carve different faces for each pumpkin, representing family members.
Benefit: Personalizes your decor while having fun with each design.
Example: Label each pumpkin with a family member’s name for a cute touch.
6. Mummy Pumpkins
Explanation: Wrap your pumpkin in gauze, leaving eyes peeking out.
Benefit: It’s an easy project, perfect for kids and a hit on social media.
Example: Use glow-in-the-dark paint for eyes to enhance the effect!
7. Elegant Floral Designs
Explanation: Carve intricate designs inspired by flowers or vines.
Benefit: Adds a sophisticated twist to traditional pumpkin decor.
Example: Pair these with elegant candles for a chic Halloween setting.
8. Animal Faces
Explanation: Create a lovable animal face — dog, cat, or owl.
Benefit: This approach is charming and unique compared to typical designs.
Example: Set these cute characters around your porch for a family-friendly vibe.
9. Haunted House Scene
Explanation: Carve an intricate scene depicting a haunted house.
Benefit: Instantly makes for a dramatic centerpiece!
Example: Consider using multiple stacked pumpkins to create layers in your design.
10. Word Art
Explanation: Spell out spooky words like “Boo!” or “Trick or Treat”.
Benefit: User-generated content potential for social media, boosting engagement!
Example: Position them at your doorstep for a friendly welcome.
11. Spooky Scenes
Explanation: Create small dioramas inside hollow pumpkins.
Benefit: Engages visitors and invites them to come closer for a peek.
Example: Use little figures and faux spiders!
12. Geometric Patterns
Explanation: Get crafty with modern designs using geometric shapes.
Benefit: Appeals to modern tastes and is visually striking!
Example: Use stencils for precision to elevate your artistic skills.
13. Carved Quotes
Explanation: Laser cut or carve meaningful quotes related to autumn or Halloween.
Benefit: They serve both as art and inspiration!
Example: “Fall is in the air!” can resonate deeply with your guests.
14. Miniature Pumpkins
Explanation: Use tiny pumpkins for intricate designs or cluster displays.
Benefit: Adds a playful touch to your overall theme.
Example: Group these together on a table for a full effect!
15. Glowing Pumpkin Lanterns
Explanation: Carve round shapes and add colored lights inside.
Benefit: Perfect for parties, providing a fun and festive atmosphere.
Example: Hang them from trees or the porch to create a magical entrance.
16. Pumpkin Planters
Explanation: Hollow out pumpkins and use them to hold fall flowers.
Benefit: An eco-friendly approach for a burst of seasonal color!
Example: Create a stunning centerpiece with vibrant colored blooms.
17. Silhouette Pumpkin Stools
Explanation: Carve out designs on old stools for outdoor seating.
Benefit: Functional yet artistic, ideal for gatherings.
Example: Decorate them for a spooky night under the stars!
18. Drippy Wax Pumpkins
Explanation: Melt colored wax on top of your pumpkins for a spooky drip effect.
Benefit: Simple to create, but looks stunning and unique.
Example: Choose colors that correspond to your overall theme!
19. Pumpkin Vases
Explanation: Carve out the top of a pumpkin to use as a vase.
Benefit: Bold and unexpected decor for your fall arrangements.
Example: Fill with seasonal flowers for a harvest-inspired touch.
20. Stacked Pumpkins
Explanation: Create a tower of smaller pumpkins topped with a larger one.
Benefit: An eye-catching and dynamic display.
Example: Use this arrangement at the entrance for a grand welcome!
21. Interactive Carving
Explanation: Invite friends and family to carve their designs together.
Benefit: A fun activity that creates lasting memories and community spirit!
Example: Host a pumpkin carving party complete with hot cider and treats!
Conclusion
Transforming your porch into a spooky paradise doesn’t have to be tough! With these 21 magical pumpkin carving ideas, you’re equipped to bring a delightful blend of creativity and festivity to your space. Remember, the key is in the details — from spooky silhouettes to charming faces, every design can reflect your personality.
Checklist for Pumpkin Carving Success:
- Choose a theme or combination of styles.
- Gather all your carving tools and materials upfront.
- Invite friends for a fun group activity.
- Display your creations proudly!
Frequently Asked Questions (FAQs)
Q1: What tools do I need for pumpkin carving?
A1: Basic tools include a carving knife, scoop, and specific pumpkin carving kits.
Q2: How do I make my carved pumpkin last longer?
A2: Apply petroleum jelly on the carved edges or use a bleach solution to prevent rot.
Q3: Can I paint pumpkins instead of carving?
A3: Absolutely! Painting can be easier and offers different creative opportunities.
Q4: When is the best time to carve pumpkins?
A4: Carve them a few days before Halloween for the freshest appearance, but not too early to avoid decay.
Wrap-Up
Now that you have a treasure trove of ideas at your fingertips, it’s time to get carving! Recap your favorite designs and how they can enhance your porch decor. Did you find our tips helpful? Share your own pumpkin carving ideas or questions in the comments below! Happy carving, and may your porch be a spooky paradise this Halloween!
Advertisements